
In this week’s free Deke’s Techniques episode, Deke continues his “subwoofer from thin air” in Adobe Illustrator project, making use of the Blend command that allows you to quickly make incremental duplicates between two objects.
We begin were Deke left off last week and draw another circle around the speaker’s surround, setting the fill to none and starting with a black stroke.

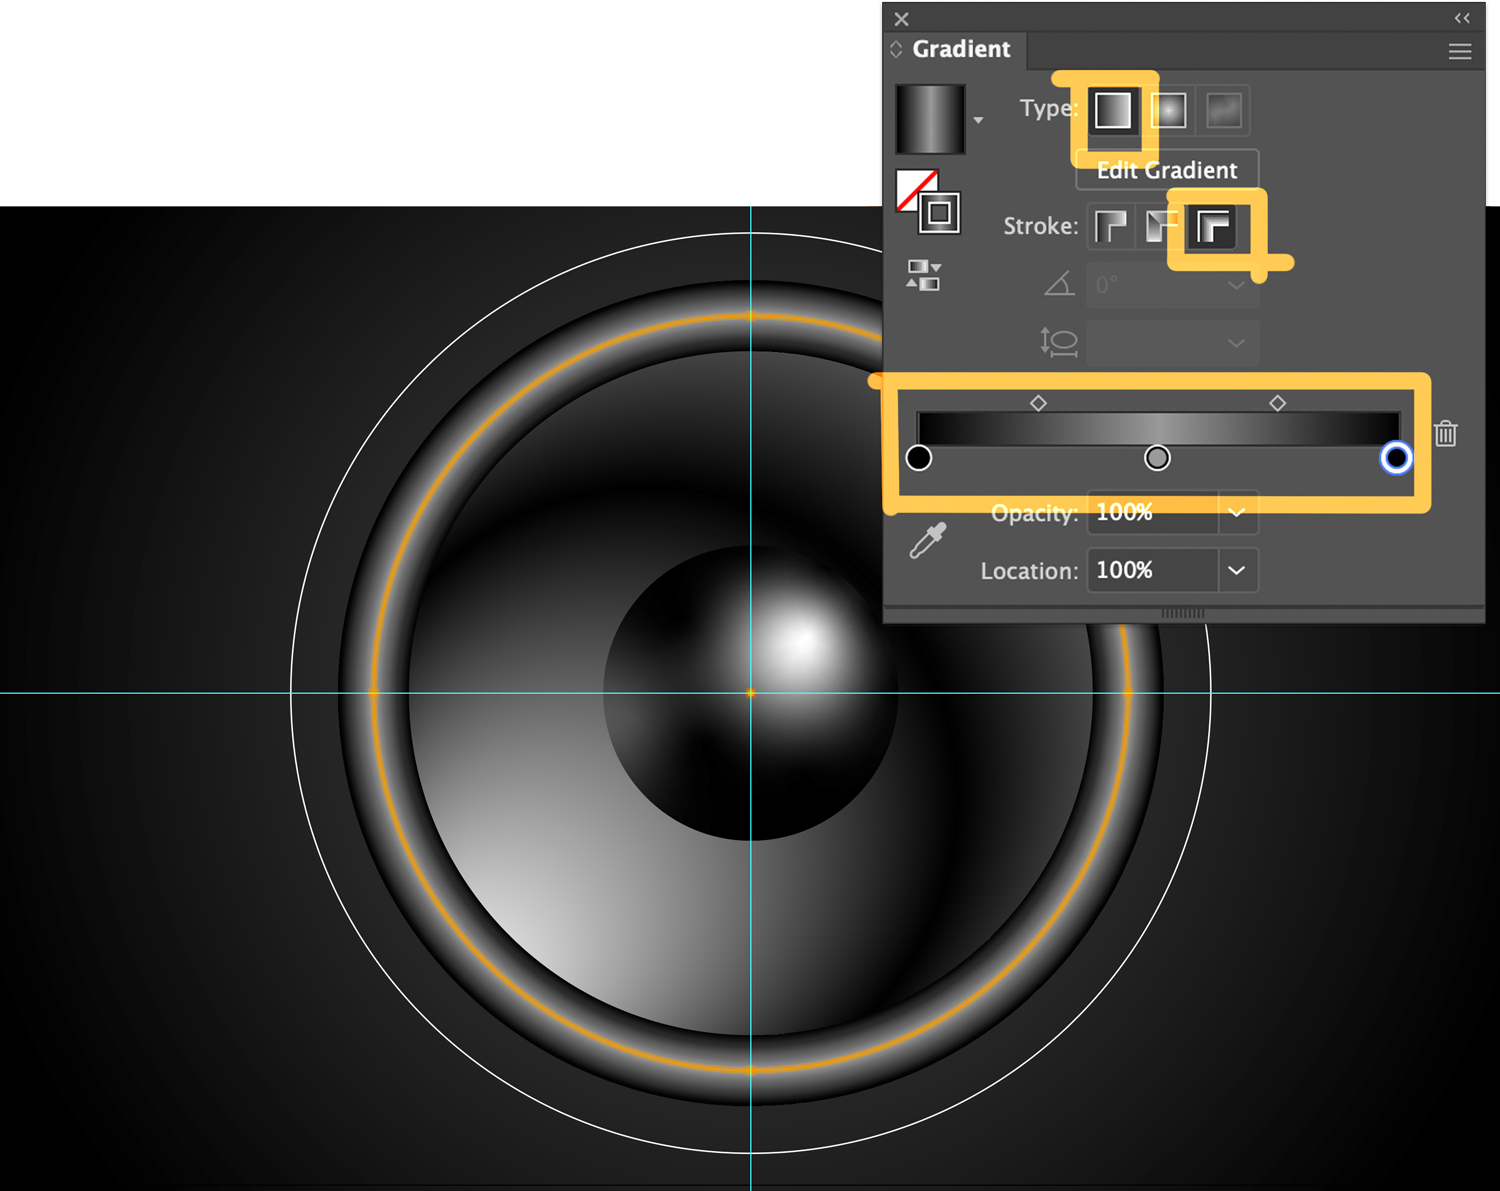
Next Deke applies a linear gradient to the new circle, which comes in as this default white-to-weak black color.

Next, Deke customizes the gradient colors and instructs Illustrator to “apply the gradient across the stroke” by using that command in the Gradient panel.
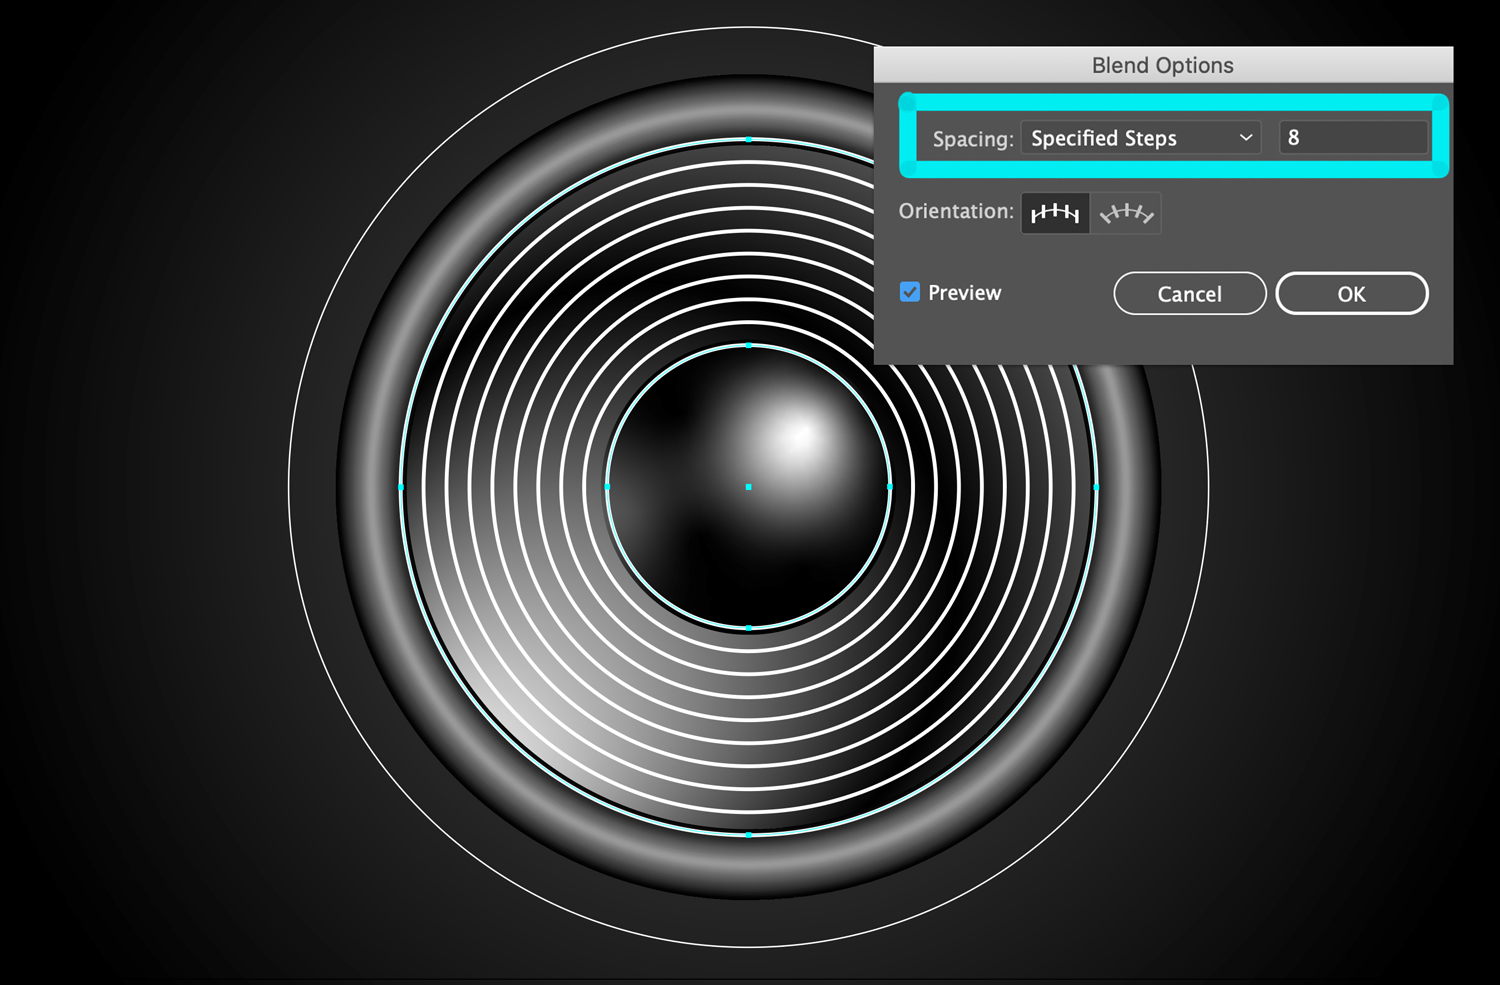
Next, Deke creates two more circles on their own layer, which will end up being the inner and outer points of the “blend” of concentric circles.

By applying a Blend command, and setting the Blend Options to 8 Specified Steps, Deke fills in the center of his subwoofer in one fell swoop.
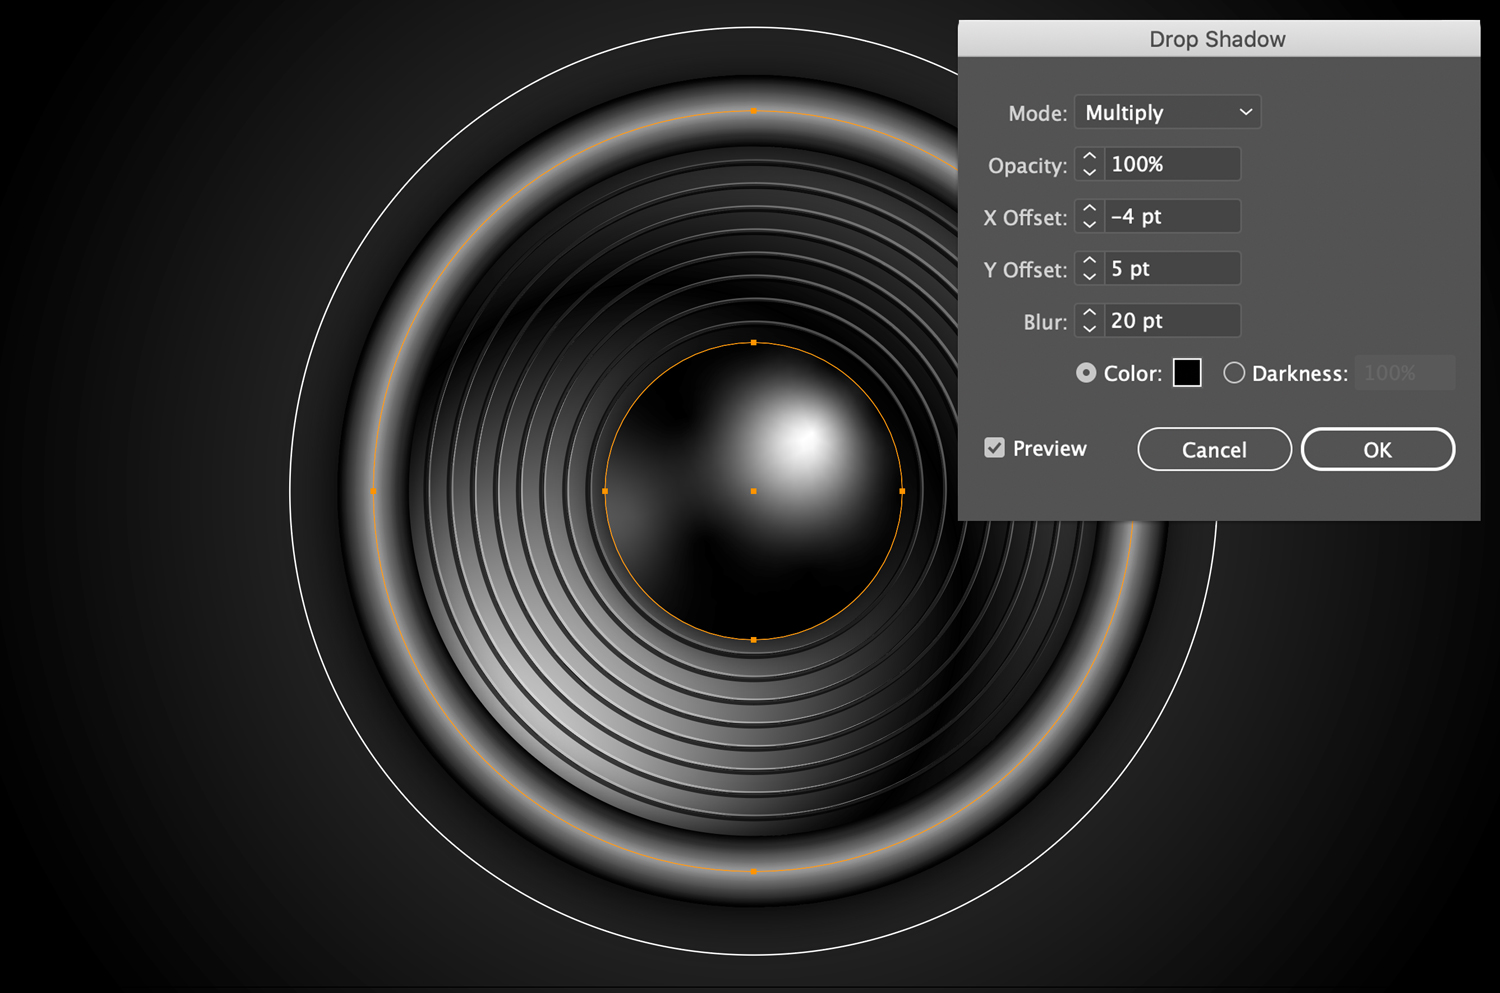
Finally, some tweaking of the blend in the Appearance panel and adding of a drop shadow gets us one step closer to the finished project.
Deke’s Techniques, listen up while you can.


Comments