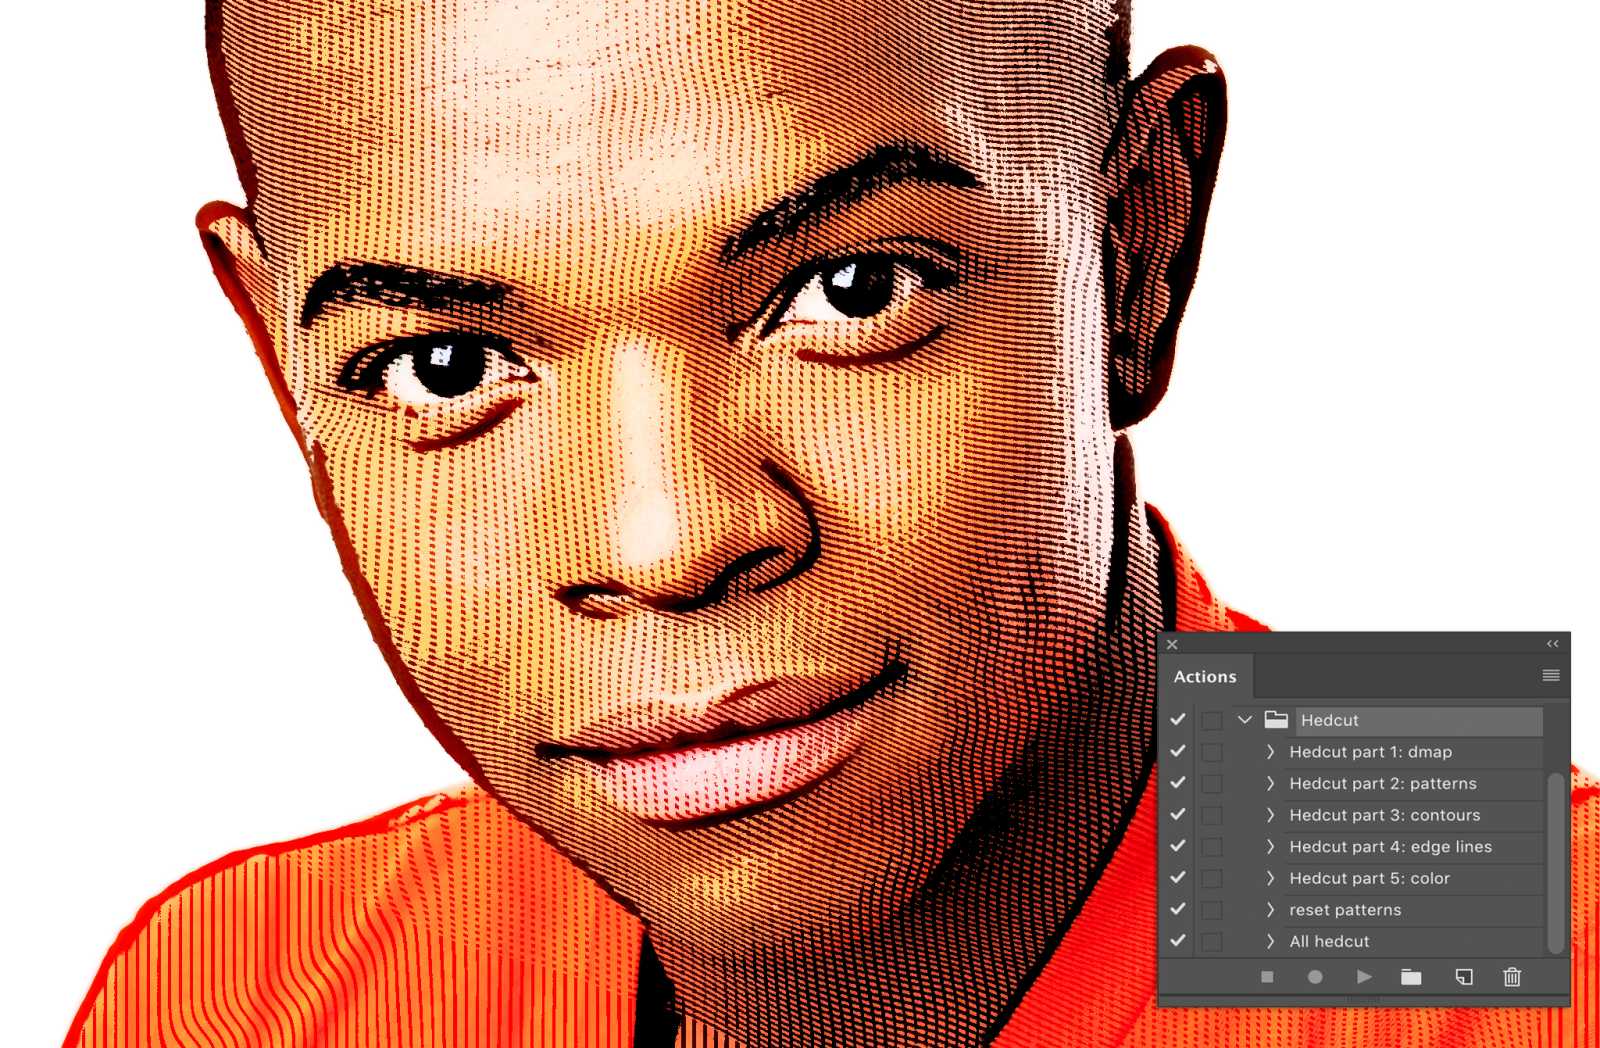
In this week’s free episode of Deke’s Techniques, Deke creates a Photoshop action that duplicates all the intricacies of an earlier technique, Deke’s Techniques Episode 723: Creating a Faux Hedcut in Photoshop.
As cool as that process was, it was a long, intricate set of steps with lots of room for error, and thus, Deke set out to see if he could record it in such a way that it could then be applied with one click to other images. In fact, the action he ended up with has five “child” actions that contribute to it. You can download Deke’s action and the image he used to create it at the bottom of this post and call it a day or read and watch on for more on actions within actions.)
Because, if you’re a member of LinkedIn Learning, Deke’s got a follow-up movie in which he shows you how each stage of this giant action contribute to the final effect, and how to troubleshoot and compile over-arching actions from other mini-actions.
Here are the phases of the action broken down. He starts with this portrait image from our friends at Dreamstime.com:

The first action creates a displacement map which will be used to shape the patterned lines that come later. Note, when directed to save the displacement map, be sure to change the file format to PSD (this is especially true for Mac users, it seems, and doesn’t respond to automation in a way that one would hope).

The next stage creates a couple of patterns that will be used to design the hedcut’s cross-hatching. Note, this bit creates the patterns, stores them, then closes out the file, so you won’t see anything on screen as it runs.
Next, the patterns are contoured across the subject’s face using the displacement map as a guide.
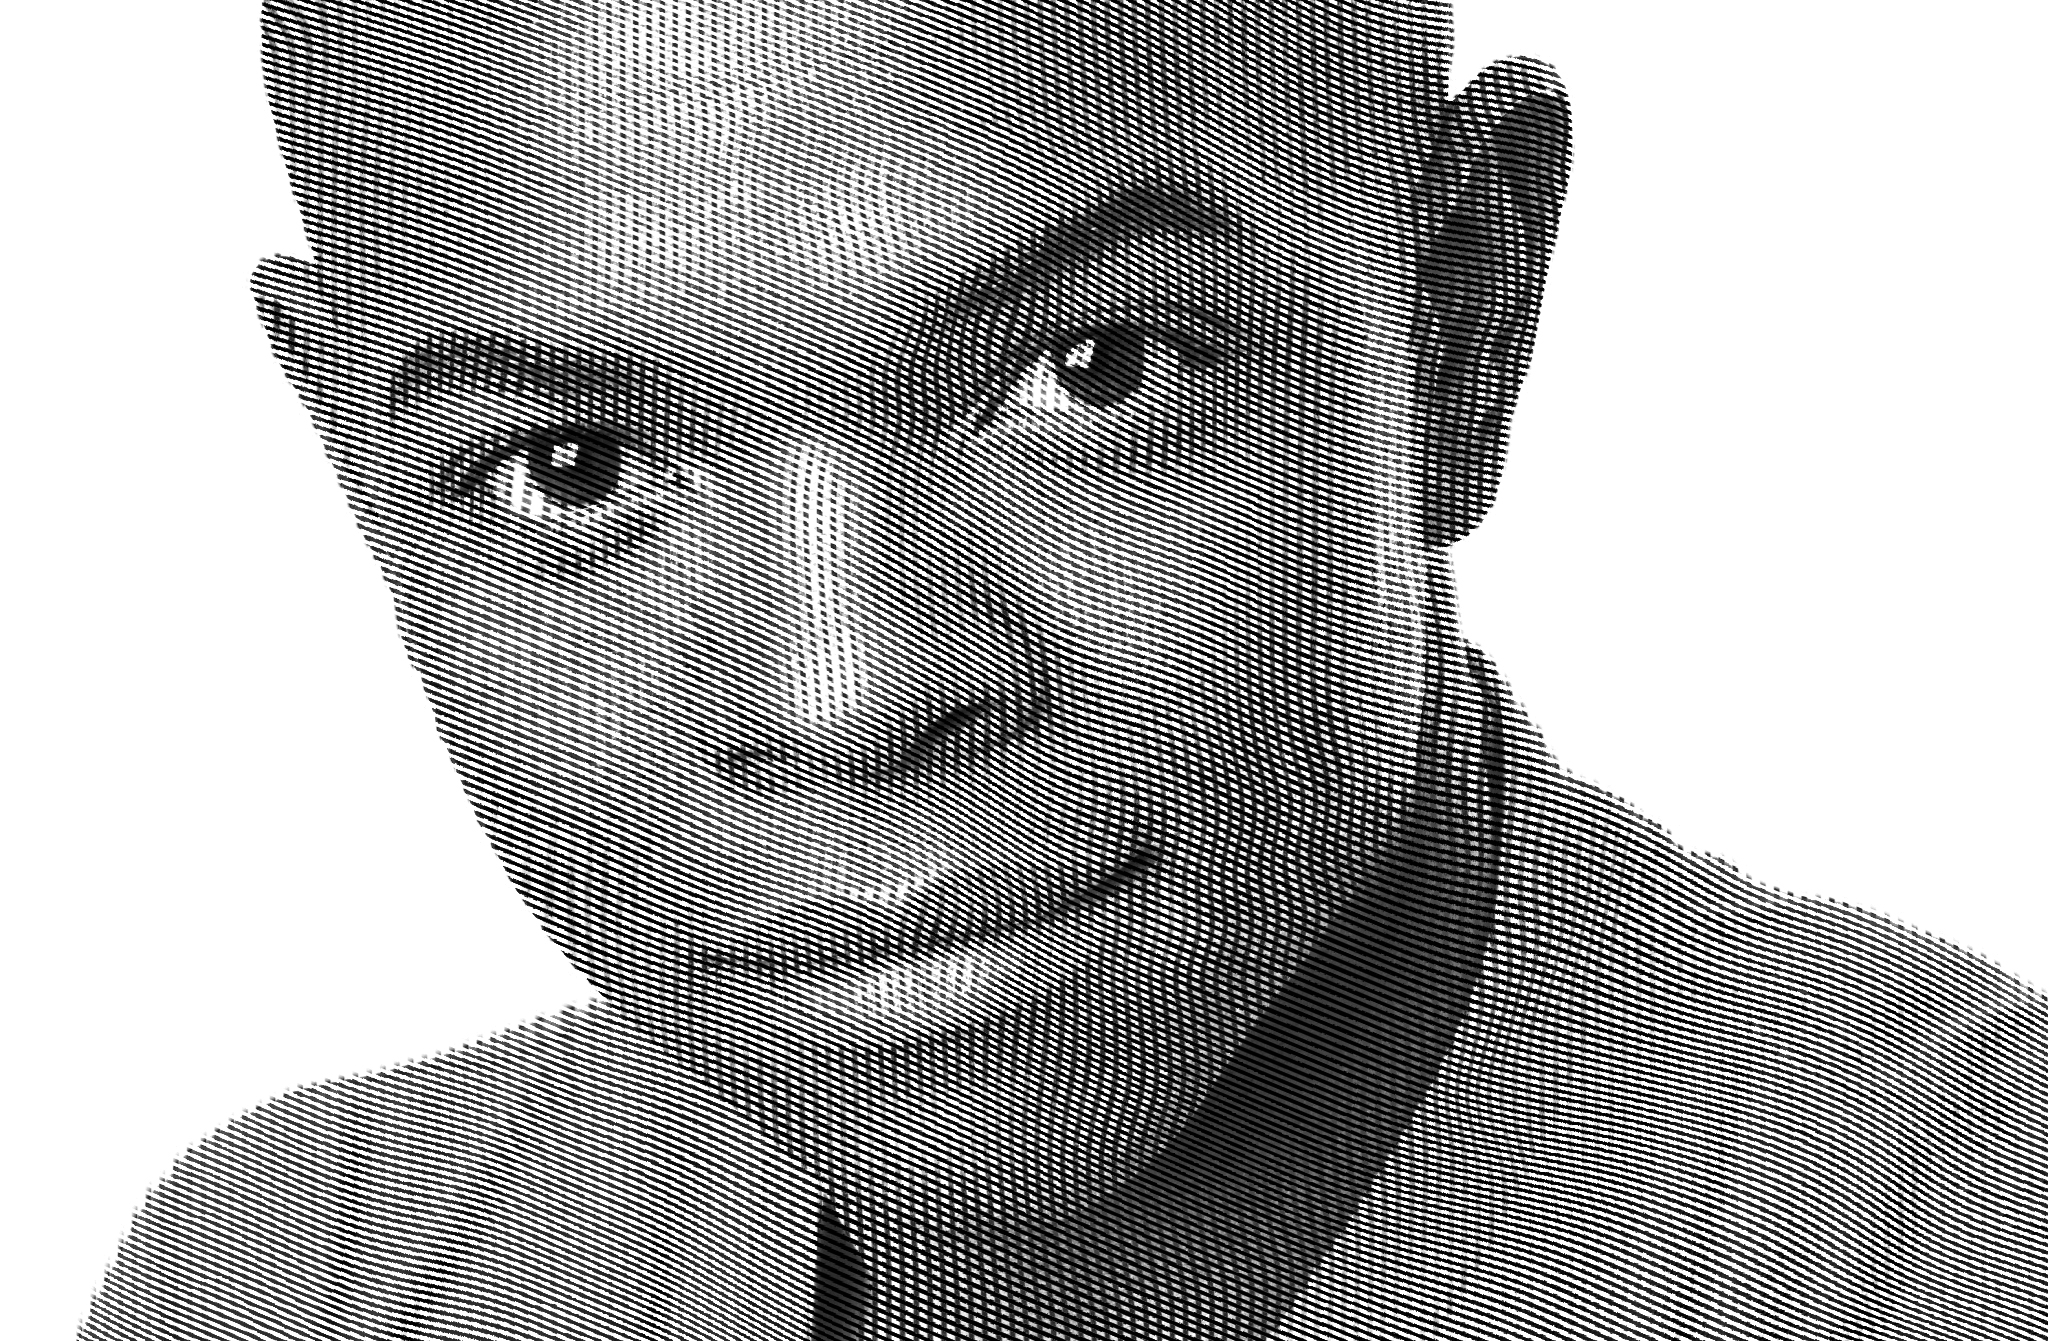
Then, lines are created around the key edges of the image.
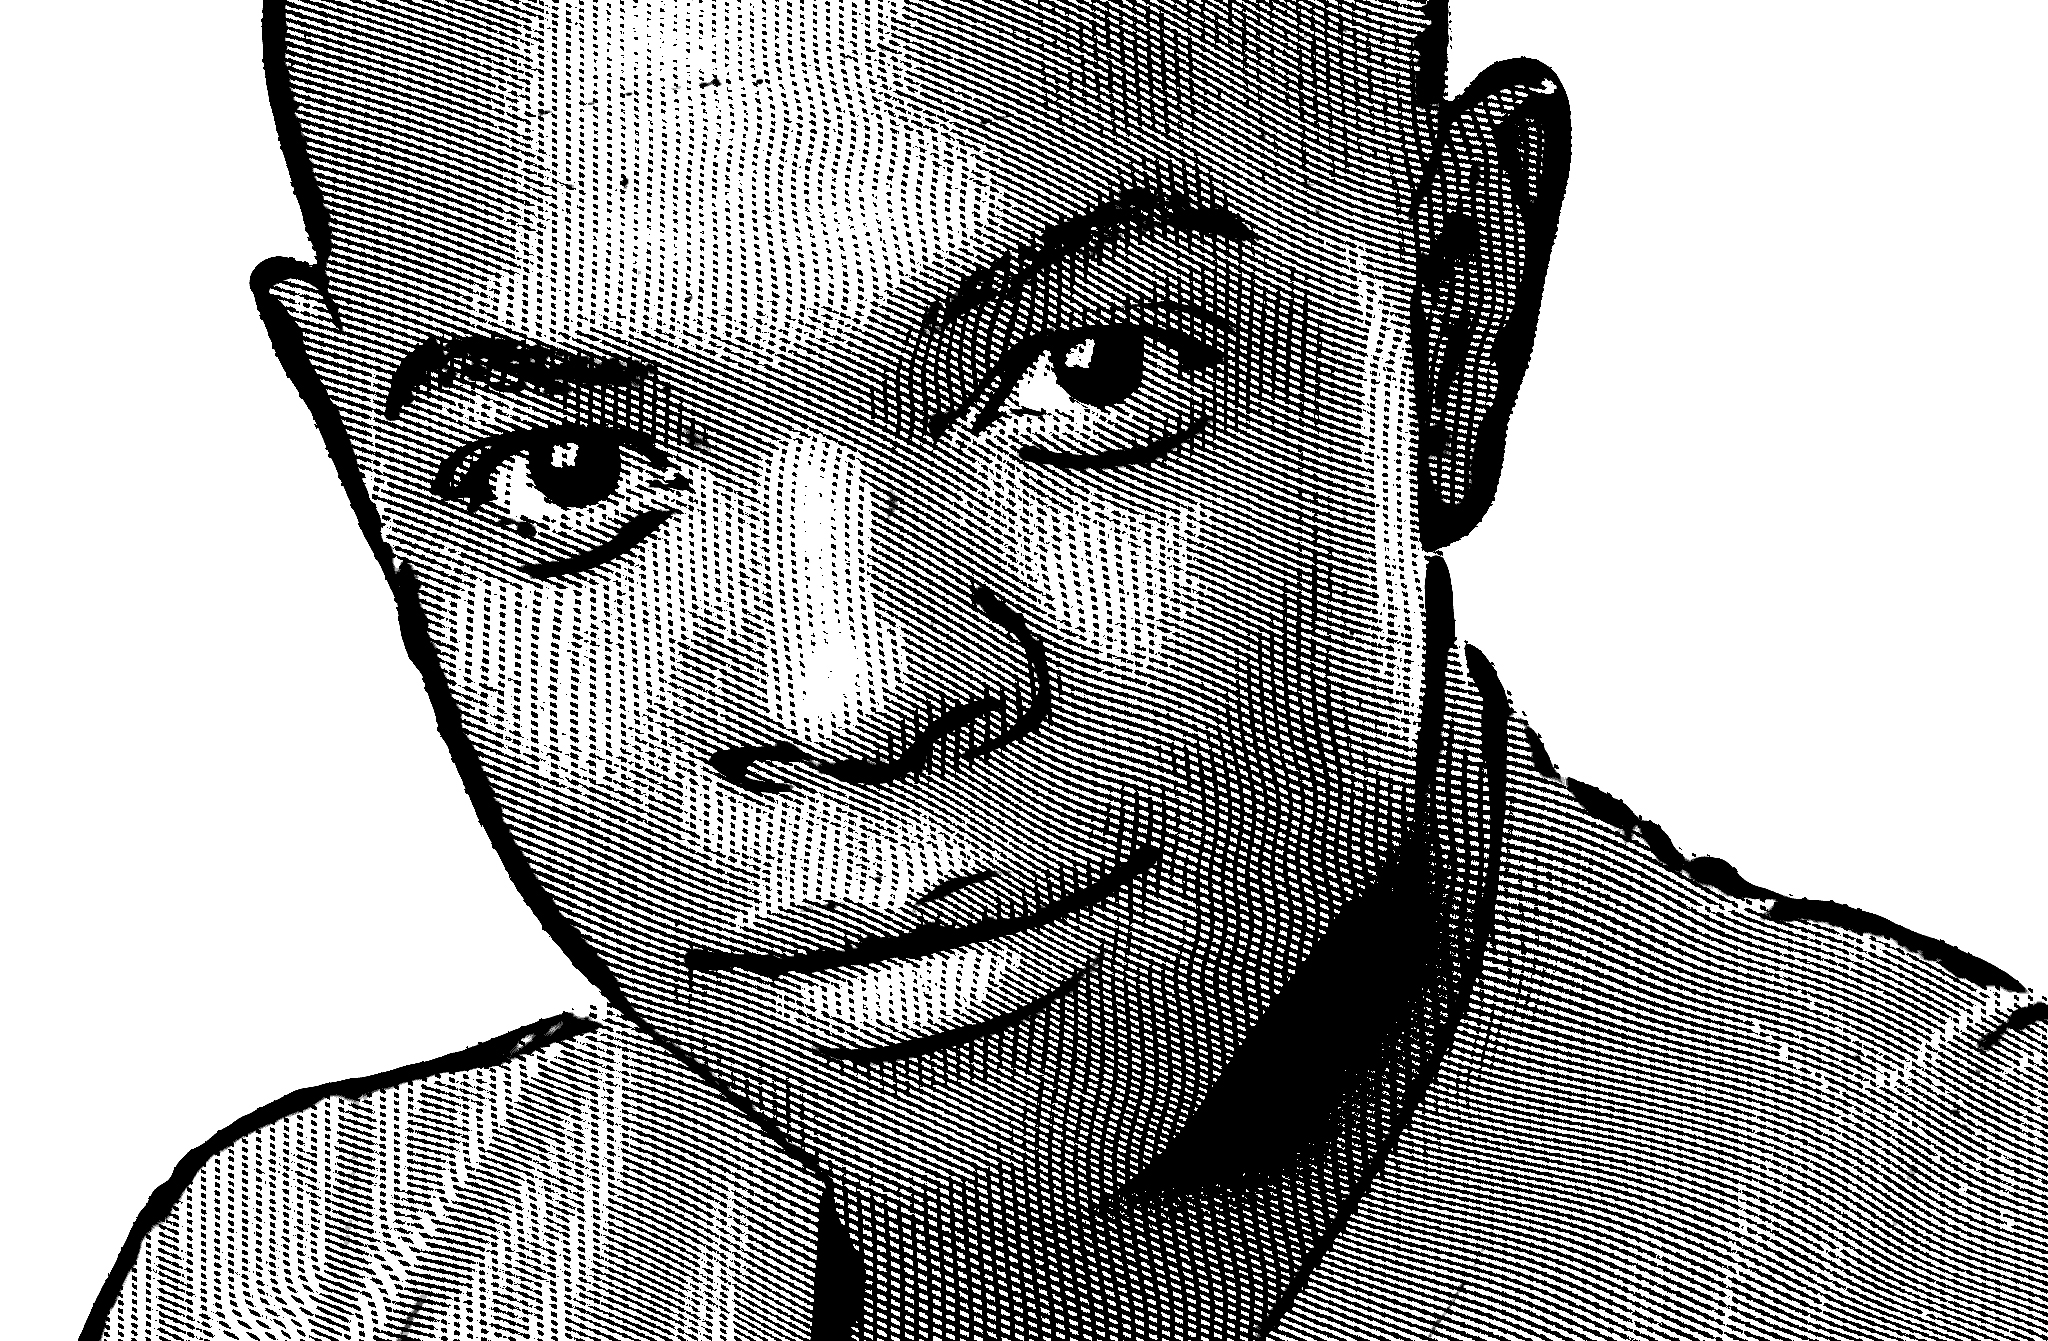
And finally, the last child-action adds in the color from the original.

Let me just say that actions are complicated and worth investing in up front, so that their one-click awesomeness can be enjoyed without frustration. (In other words, enjoy the frustration up front, knowing that once you finish troubleshooting, you’ve finished for good.)
Case in point, even Deke had to spend today troubleshooting his original action to make sure it worked without fail. So definitely grab the one we’ve provided (which Deke has “betterized” for your enjoyment). Even Photoshop masters have to tweak their actions to account for all contingencies.
Deke’s Techniques, providing you more efficient ways to apply Deke’s Techniques.
Related downloads
- Action and Sample File for Deke's Techniques 783
- Log in to download these files.


