In this week’s free Deke’s Techniques episode, Deke introduces you to the new Color Grading feature in Adobe Camera Raw/Photoshop/heck, even Lightroom. If you had ever explored Split Toning in any of these products, well then, stop and take a look at what it’s grown into.
Like Split Toning, Color Grading allows you to adjust colors in your image on the basis of Highlights and Shadows, but now you can apply color adjustments to Midtones, as well.
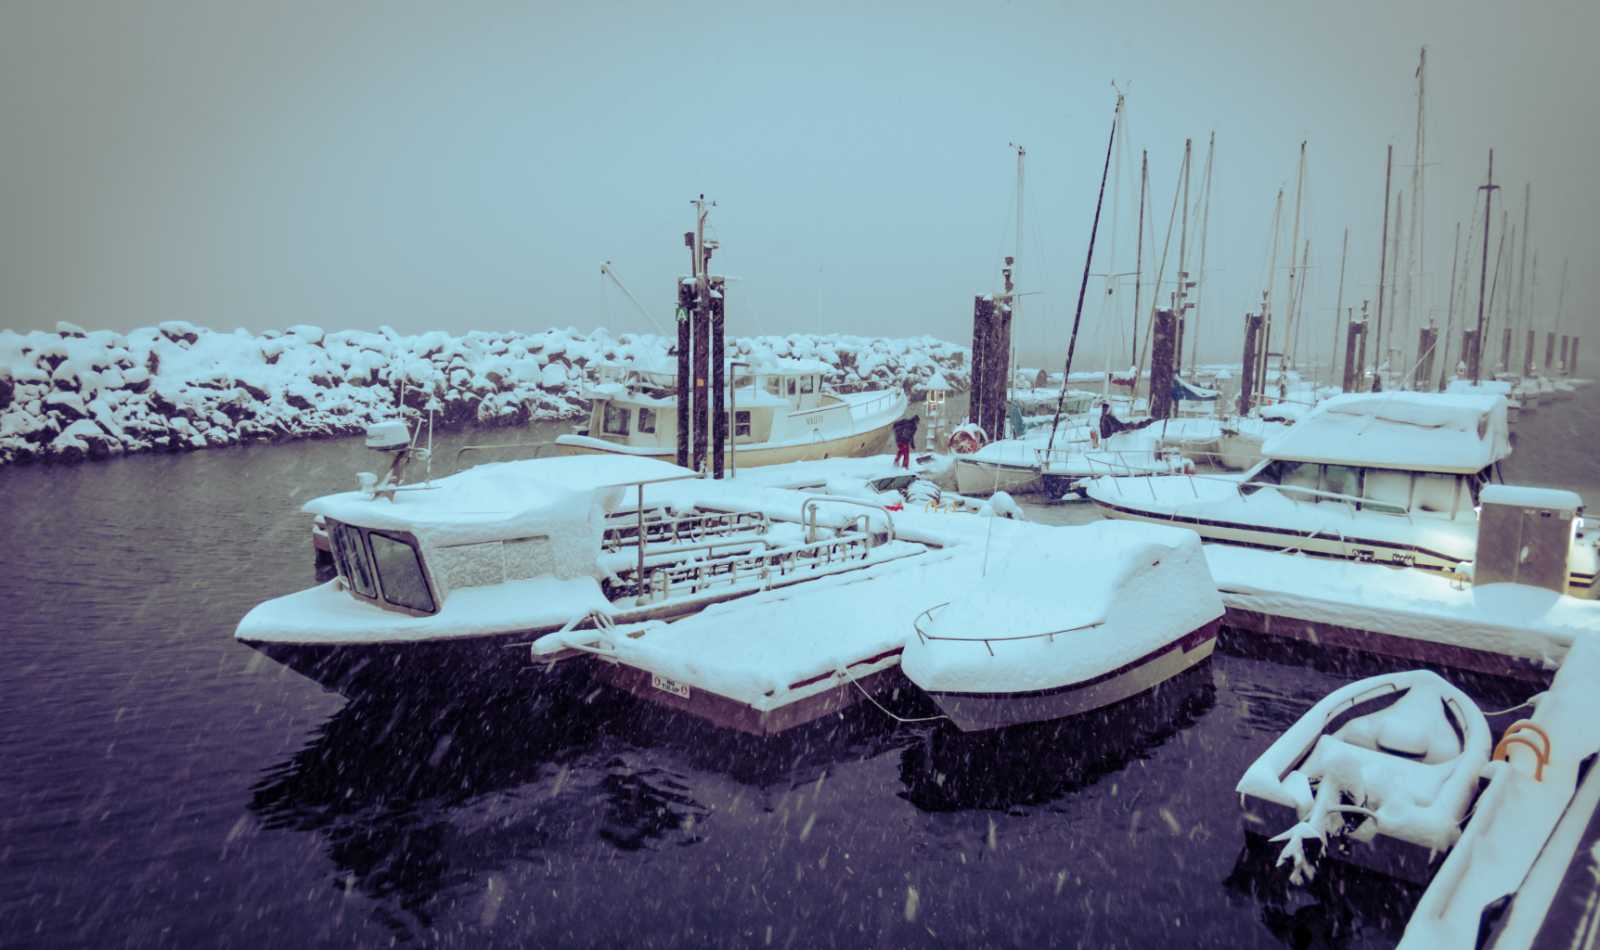
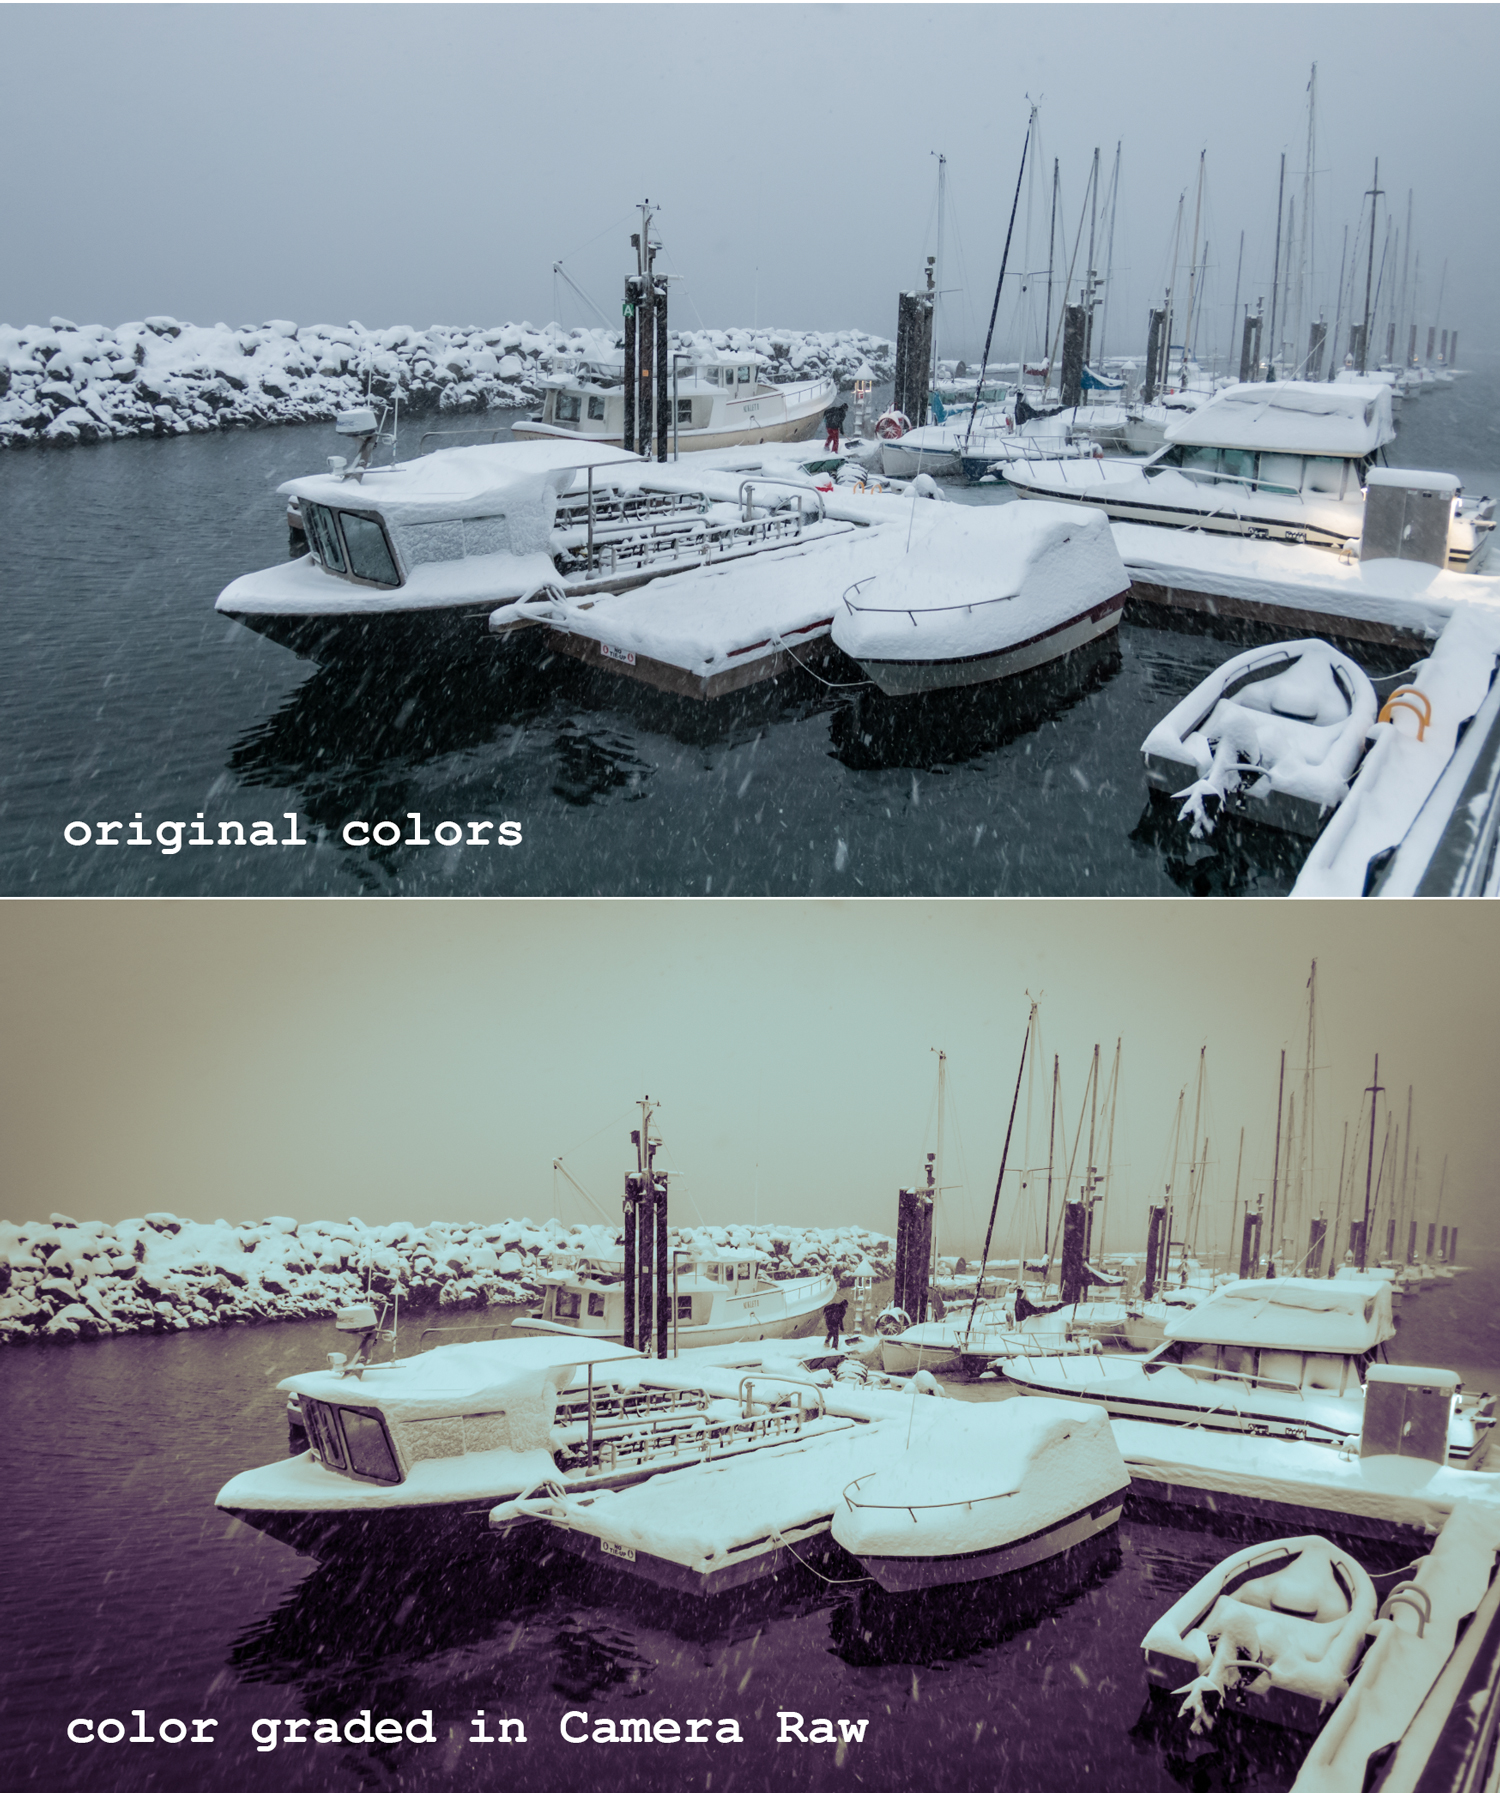
For example, the snowy dive-boat scene on top in the image below contains the original colors of the Hornby Island dock. (Did we really put on drysuits and jump in that water? Yes, we did.) The bottom image has allowed Deke to make the sky a nice sepia and the water a nice deep purple.
The sample file for today is particularly apt, because we are at last seeing snow outside our window here in Boulder. The (Although I’m so longing for travel I wouldn’t mind a snow-blanketed dive adventure right now.)
(Note that you can apply Camera Raw features to .jpeg files by converting your image to a smart object and using the Camera Raw filter in regular Photoshop. )
Also note that if you use Lightroom, Color Grading works the same way in the Develop module, except the toggle on and off feature is a switch instead of a twirly triangle.
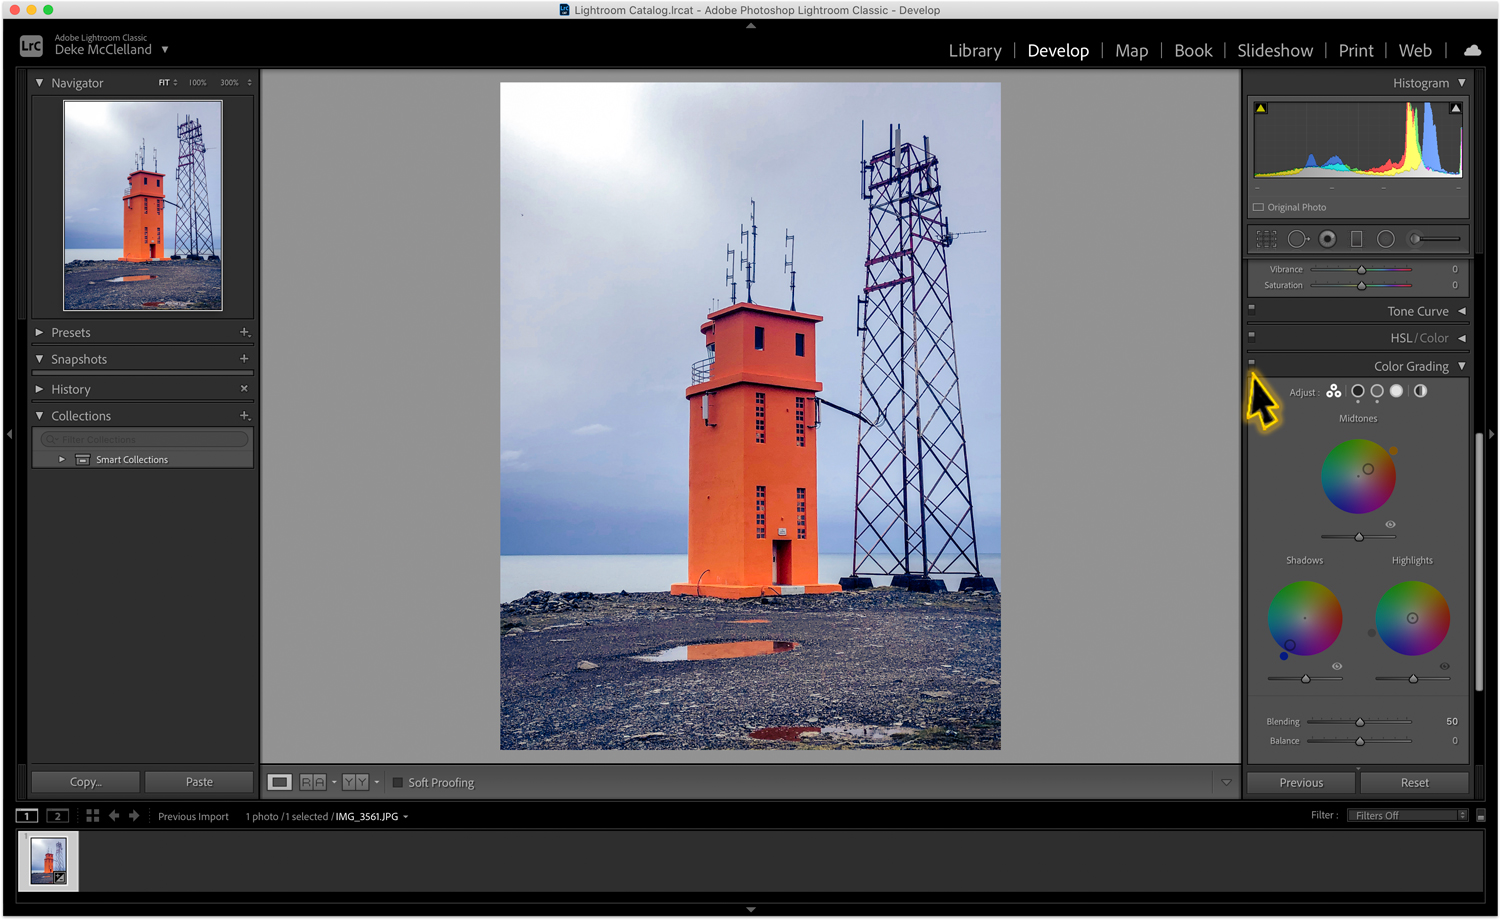
Sigh, yet another photo from my archive that mocks my lack of travel. Interestingly, the orange lighthouse of eastern Iceland really was orange, and it remains mostly orange despite how much I spin the Color Grading wheels around.
If you’re a member of LinkedIn Learning, Deke’s got an exclusive video this week in which he shares some of his tips and tricks for using Color Grading.
Deke’s Techniques, helping you spin the colors of your world, even if you’re staying put.


Design is always a work of imagination
great
svfb