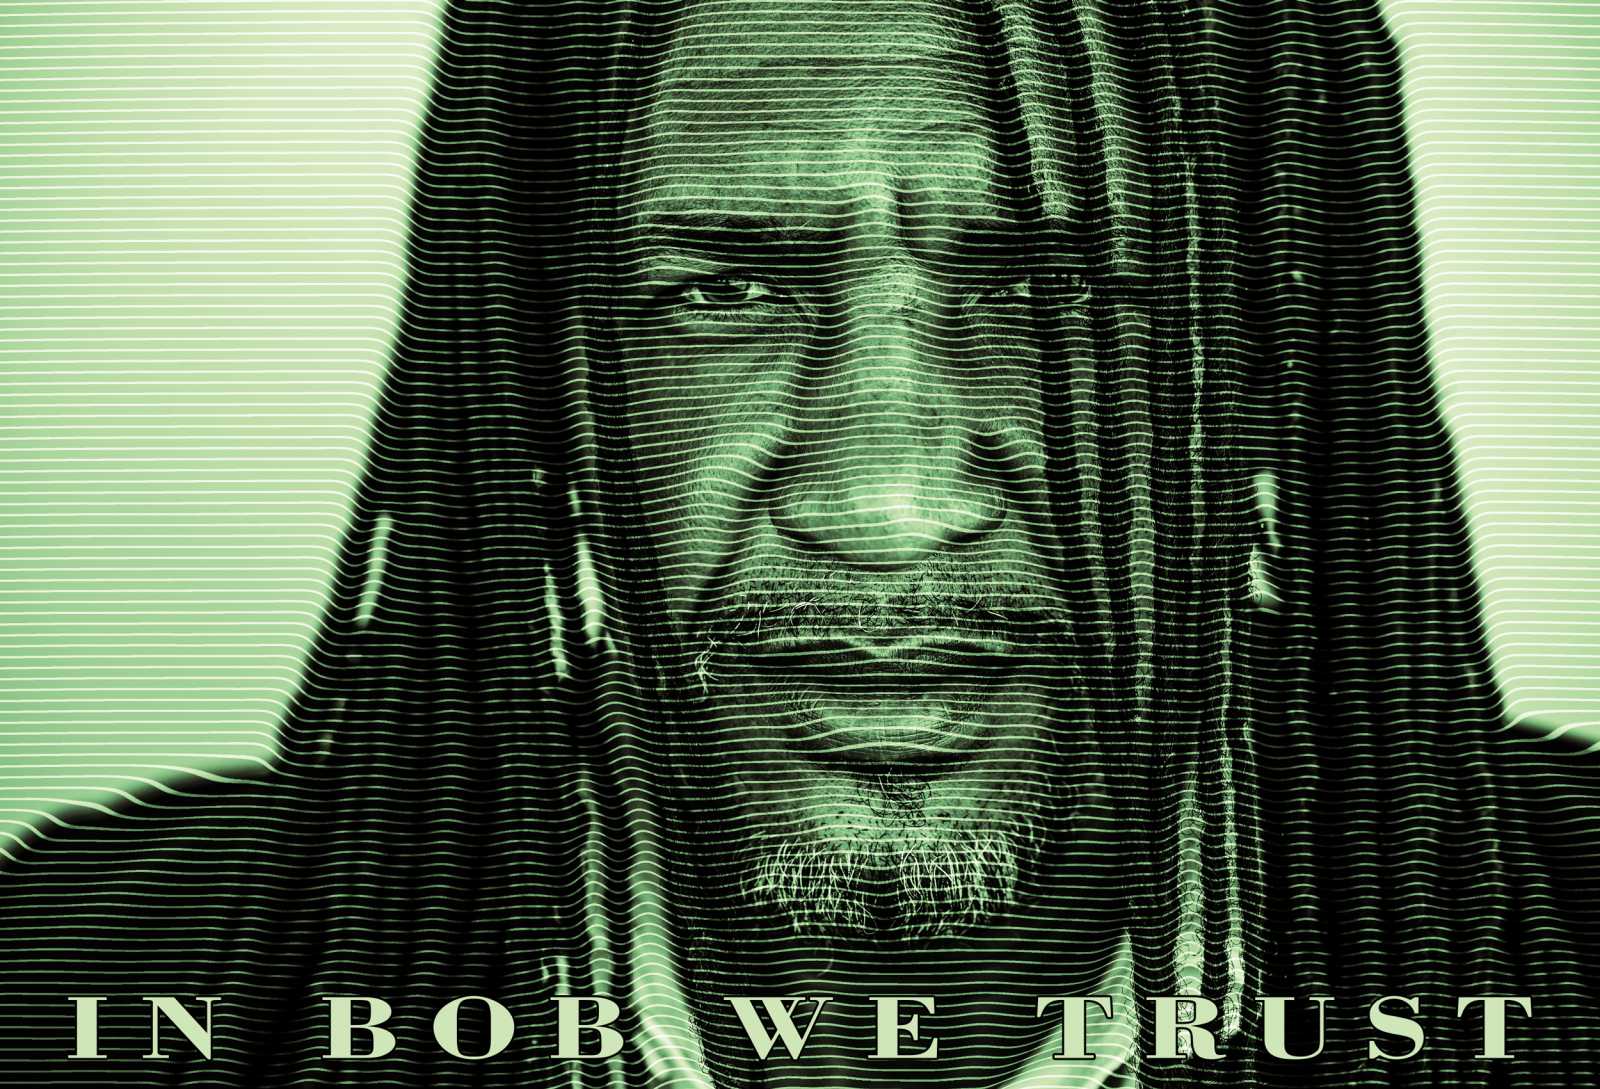
In this week’s free Deke’s Techniques episode, Deke uses a variation of his Photoshop contour mapping experiments of the past few weeks in order to create an etched engraving portrait reminiscent of good ole’ American cash.
He begins with this soon-to-be-elder-statesman portrait from our friends at Dreamstime.com:

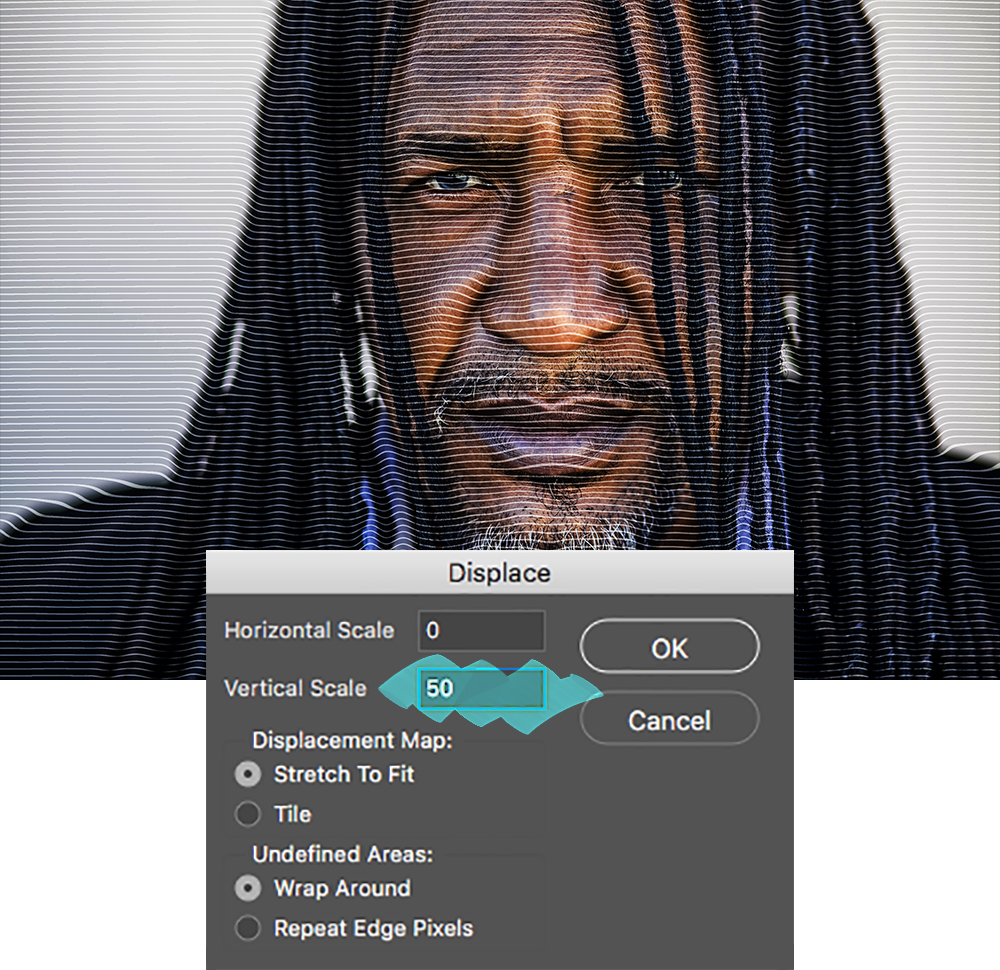
Then, he creates some contour map candidates by saving off versions of each of the Red, Green, and Blue channels. Turns out, the Blue channel–based map gives the best “etching” results when applied as a contour map here:
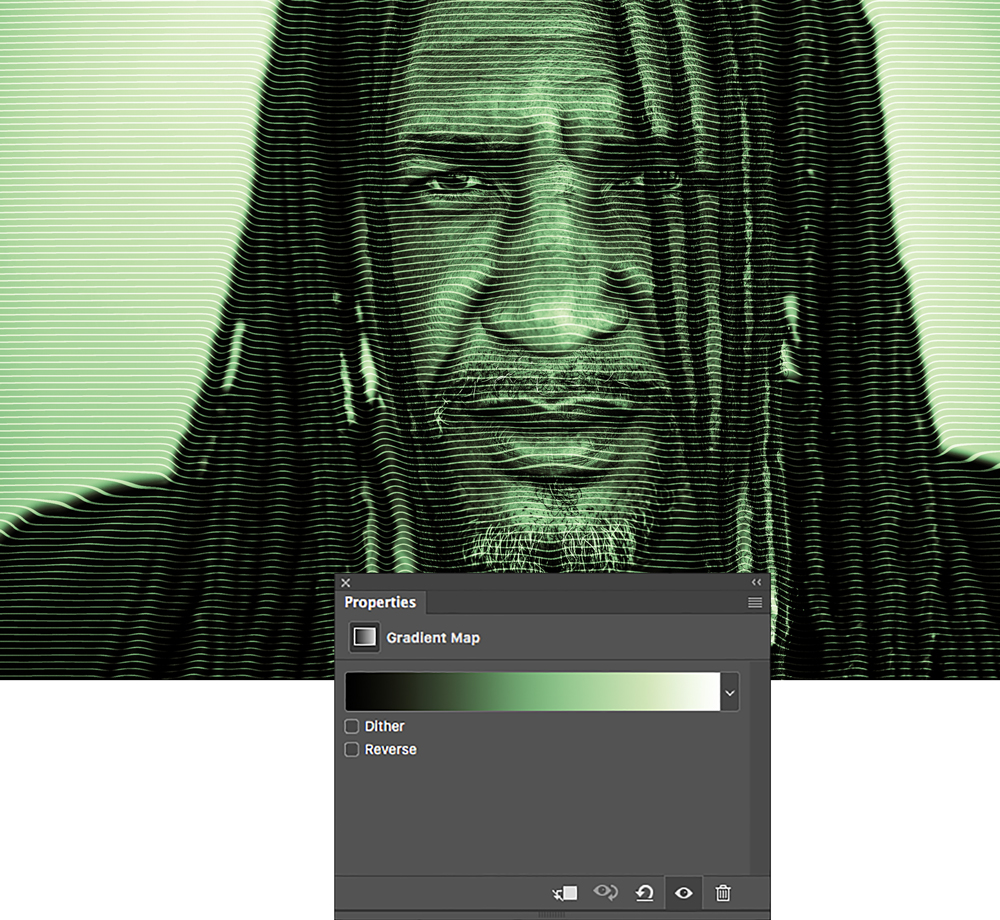
And if you’re a member of Lynda.com or LinkedIn Learning, Deke’s got an exclusive movie in which he shows you how to add that “American Cash” green tint to really sell the effect:
Deke’s Techniques, on the money every week.


