
In this week’s free Deke’s Techniques, Deke shows you how to get around the complete and total lack of adjustment layers in Adobe Illustrator. (What is with that, btw? I don’t know either!) Specifically, how you can nondestructively lighten (for print) or darken (for web) an illustration (for output) without permanently changing it.
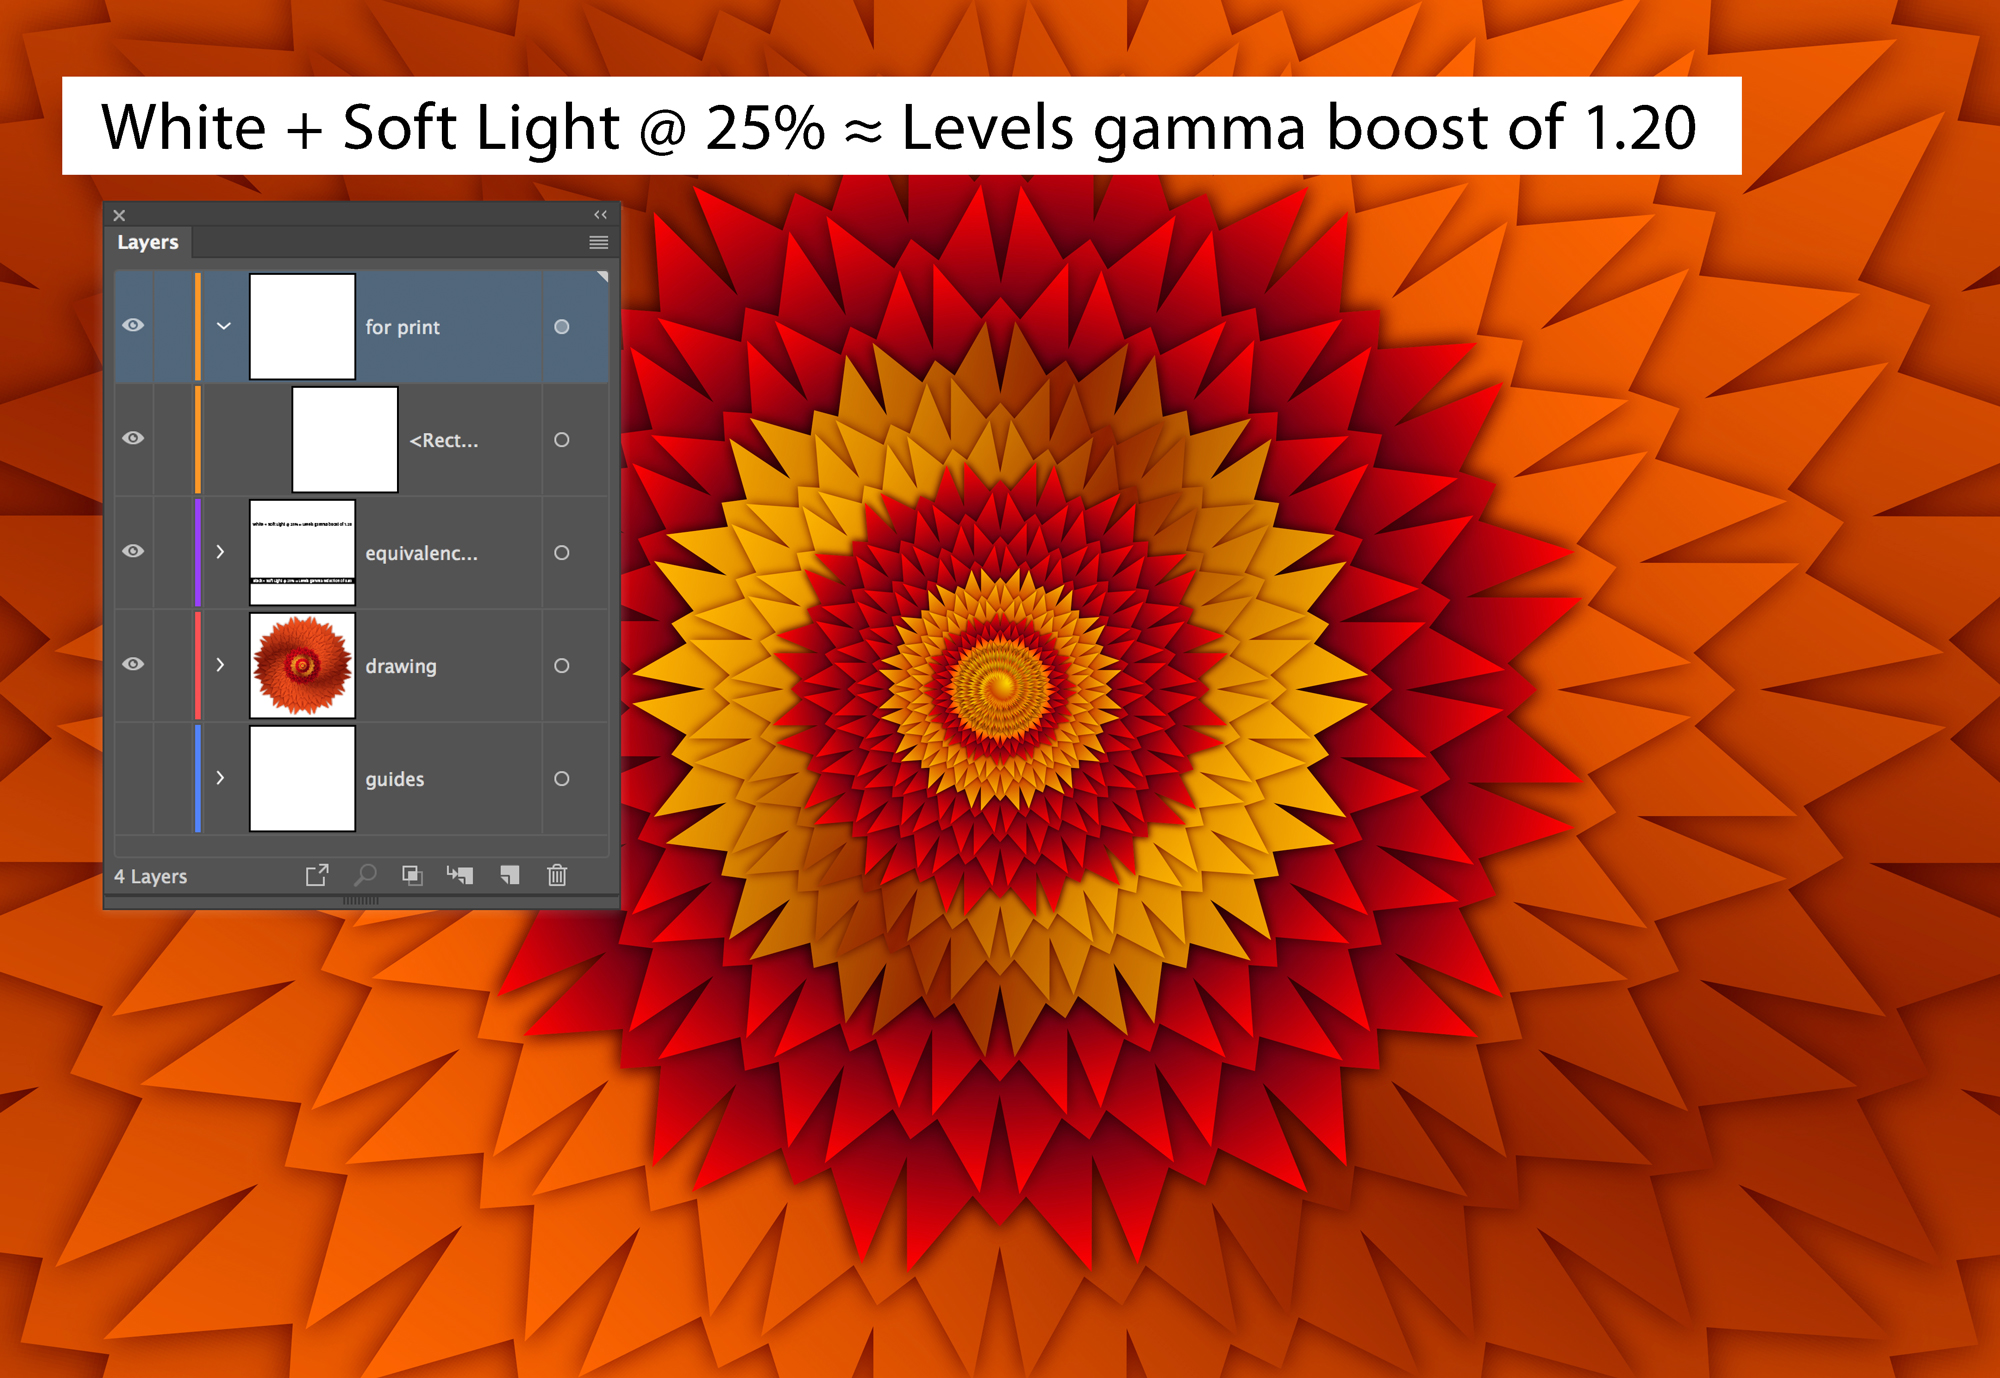
The key is adding a white or black layer over the entire illustration, setting it to the Soft Light blend mode, and changing the Opacity level to 25%. So you can take this illustration:

And add a giant white rectangle over the entire thing to lighten it. And it works in almost exactly the same way as increasing the Gamma value would do in a Levels adjustment layer in Photoshop:
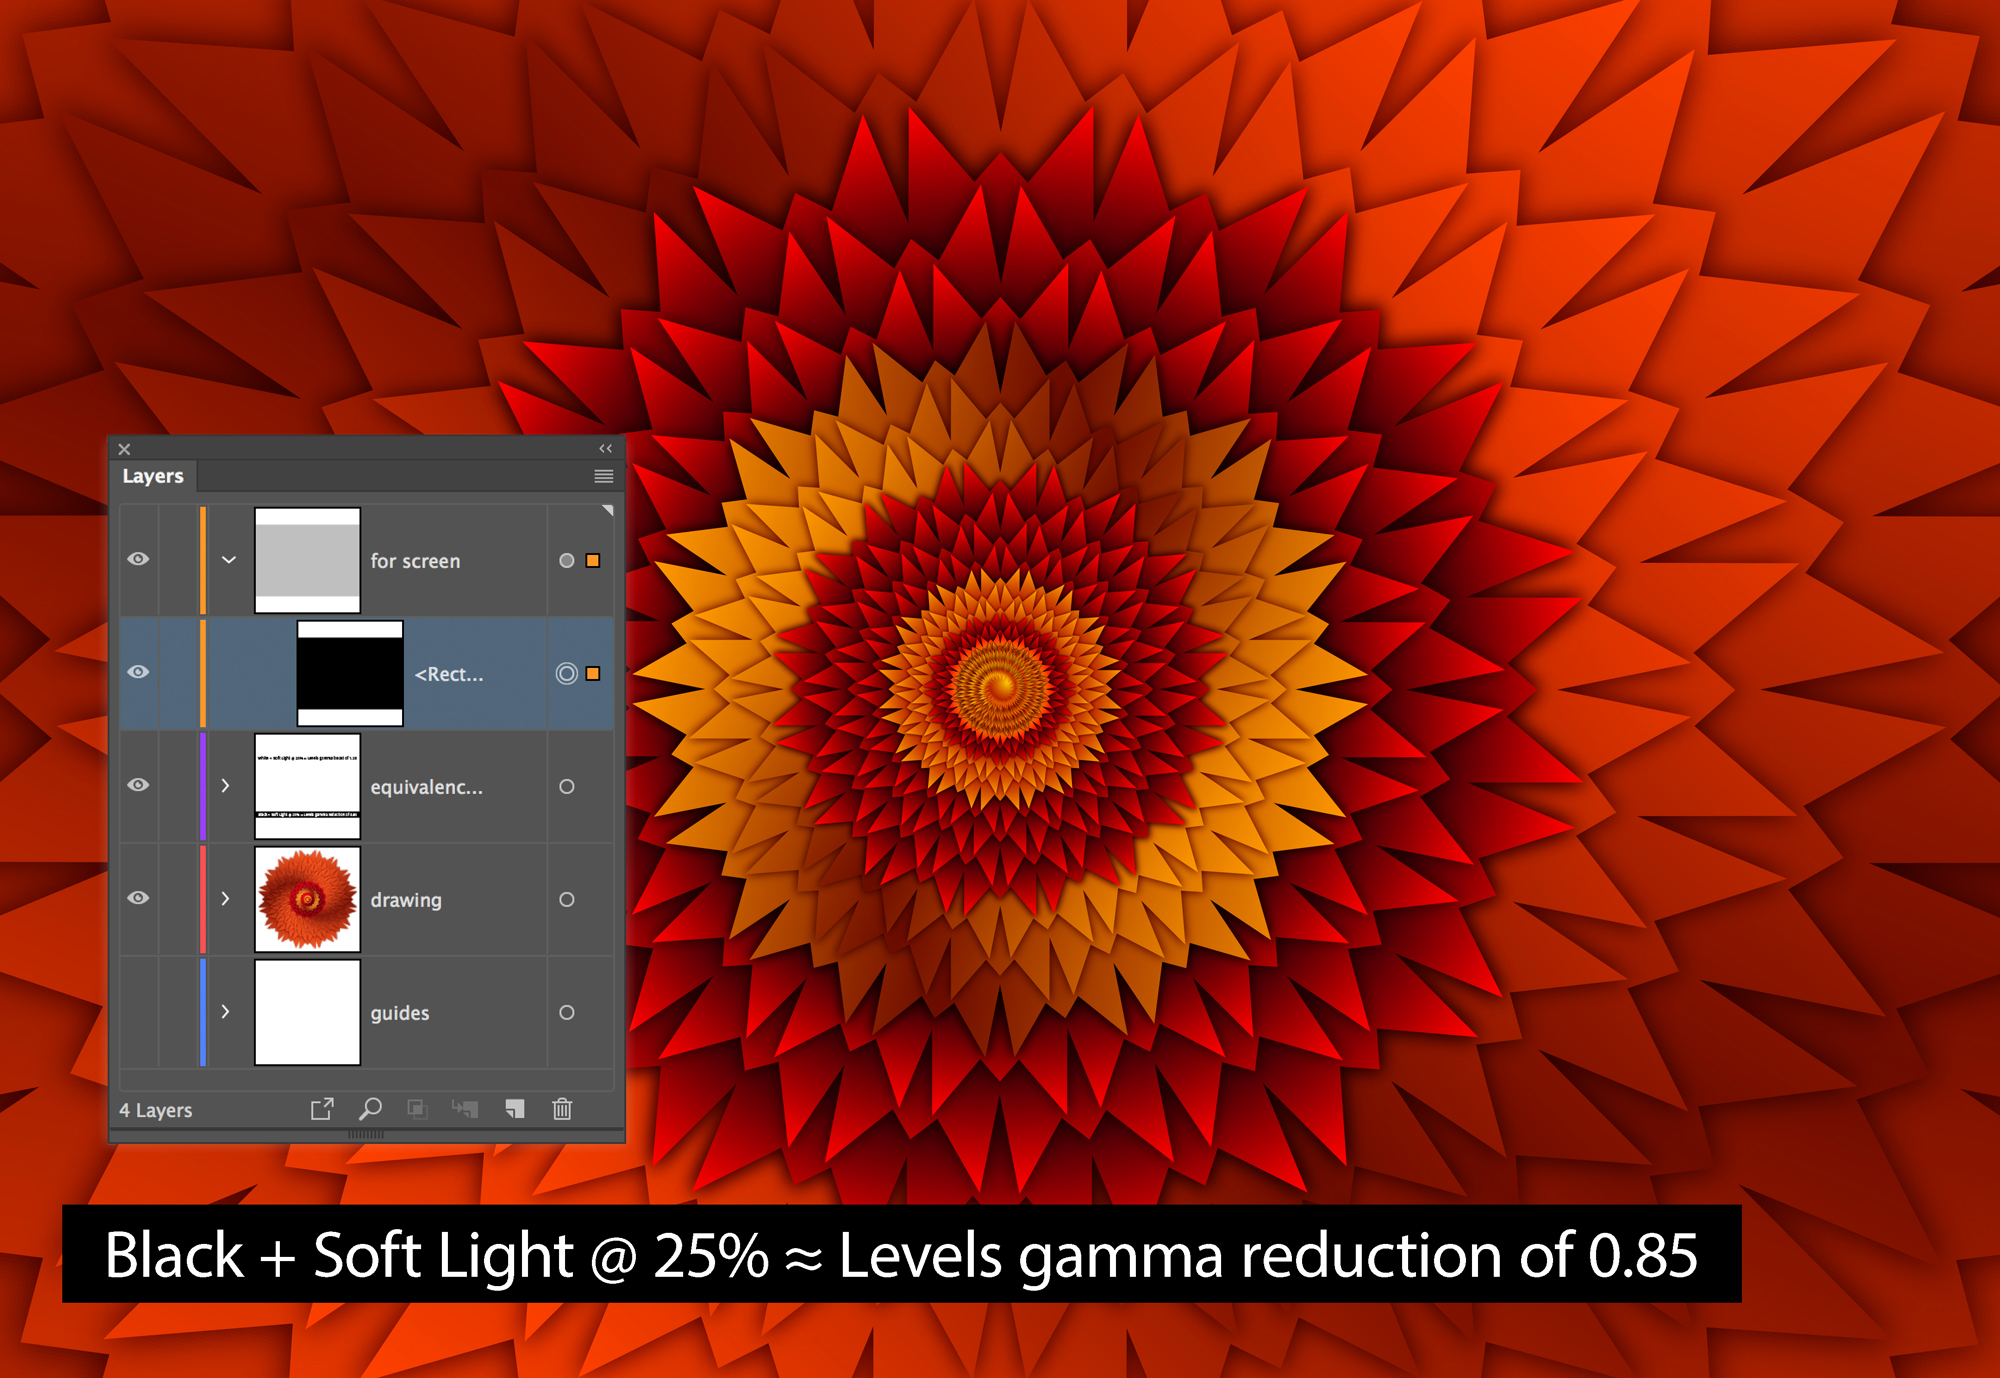
The same goes for filling said rectangle with black. Which has the effect—again, were we in Photoshop—of reducing the Gamma value in a Levels adjustment layer.
Deke’s Techniques: The only episodic tech thing that occasionally poses the question, “Why is Santa lecturing me?”


Be the first to drop some wisdom...