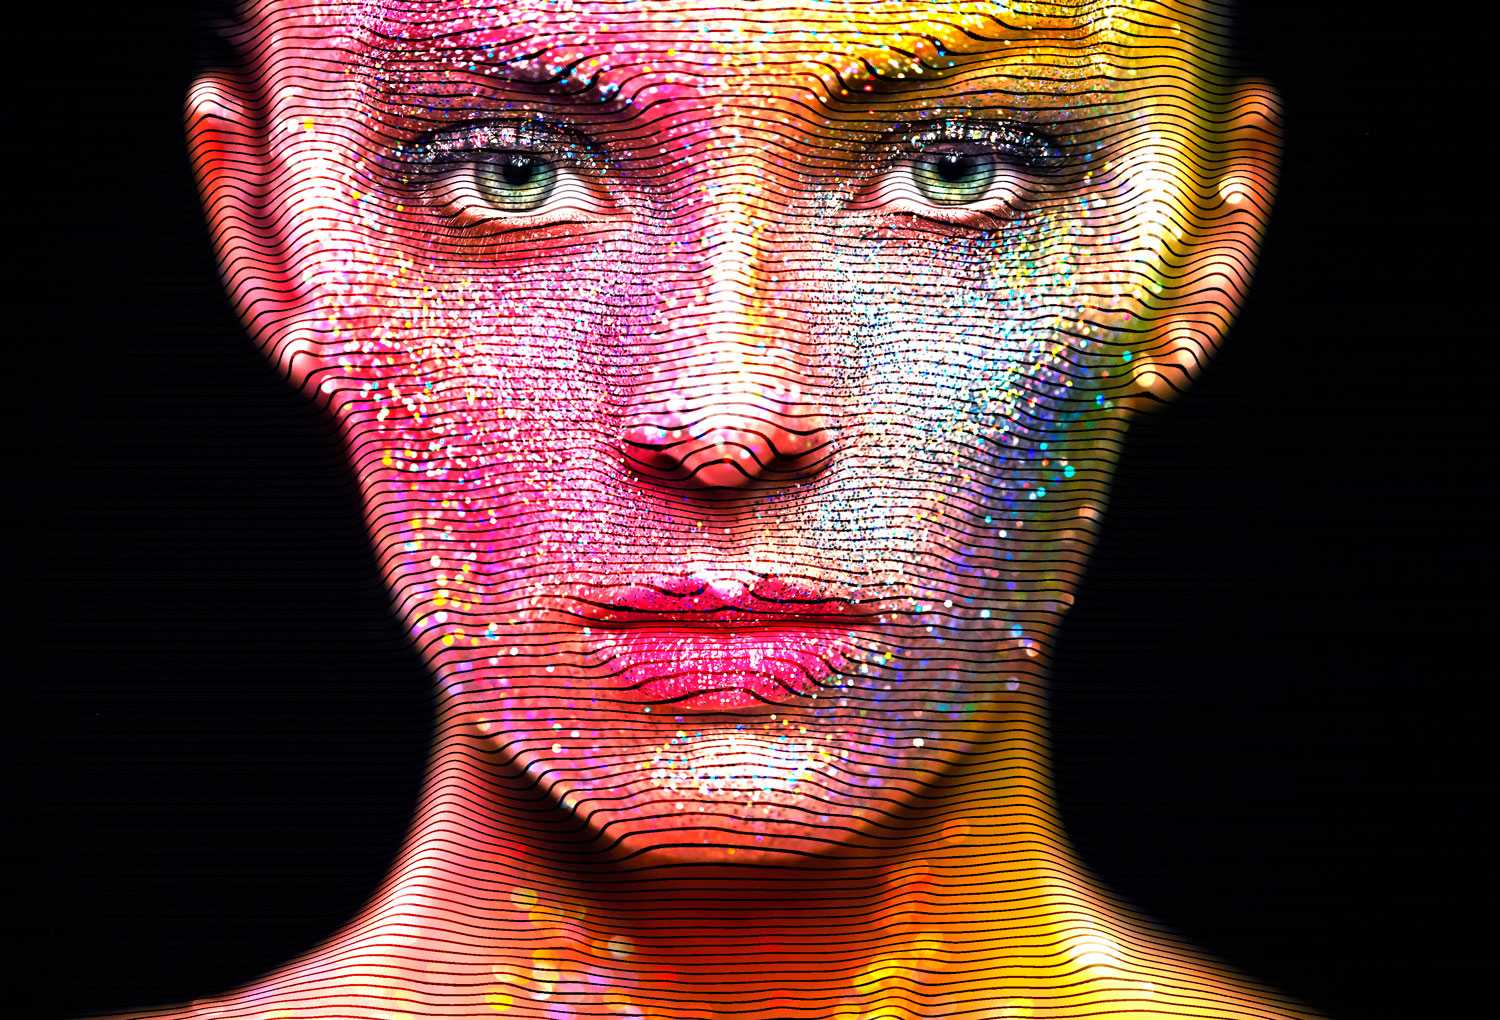
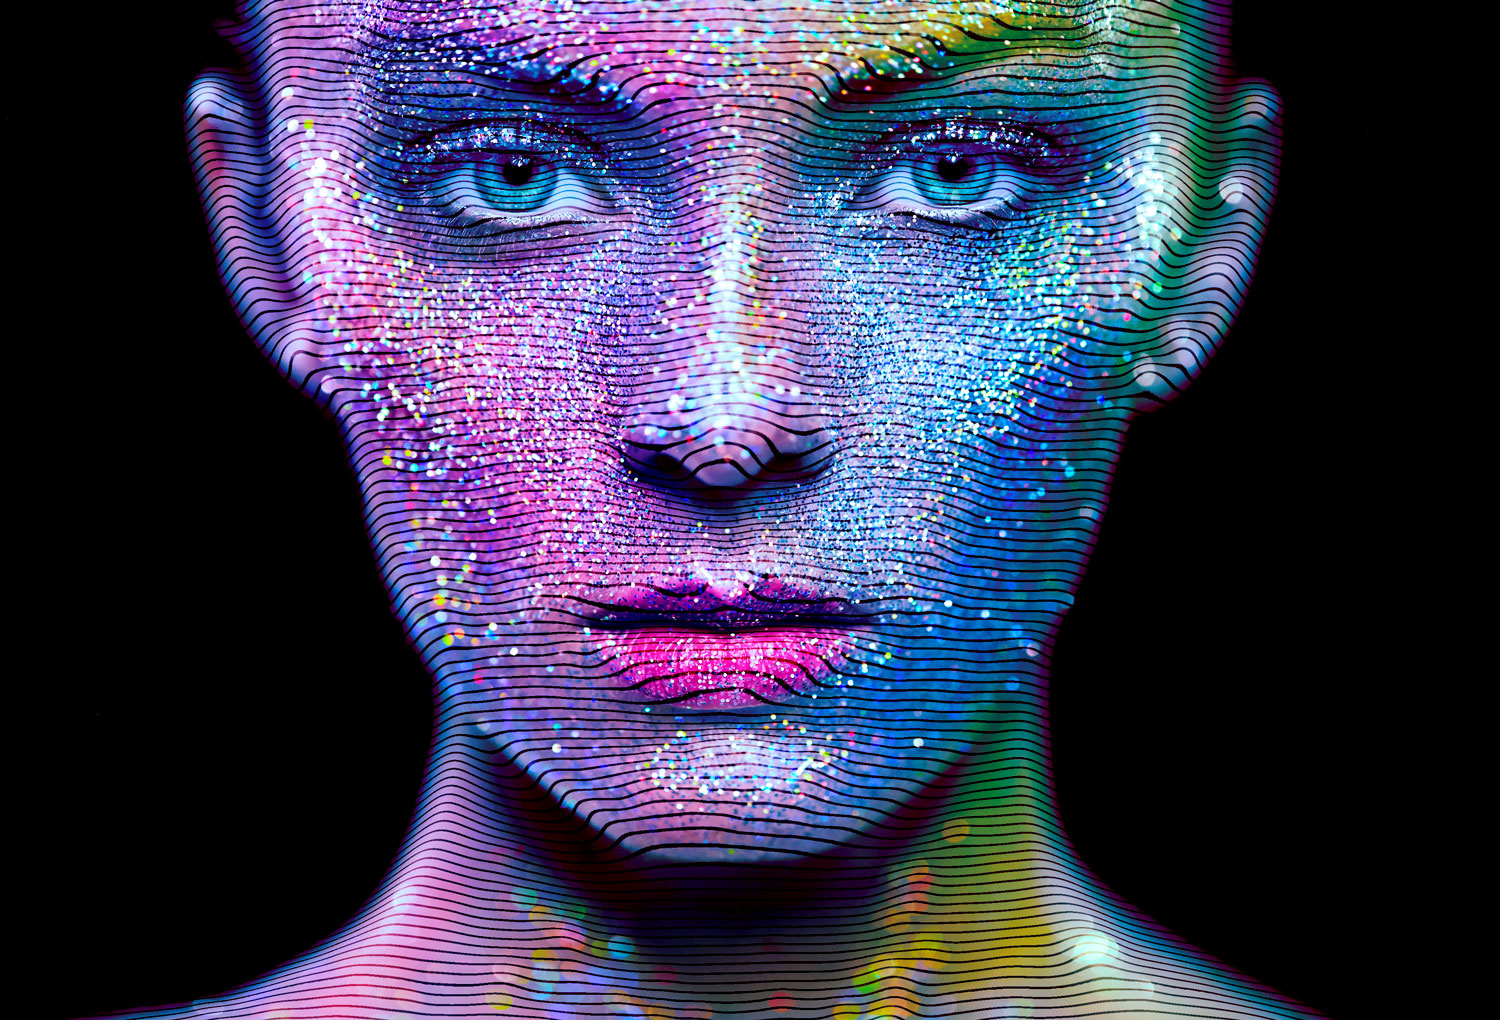
In this week’s free episode of Deke’s Techniques, Deke uses a displacement map in Photoshop to contour lines across his model’s face, using luminance values extracted from the original portrait to create the distortion.
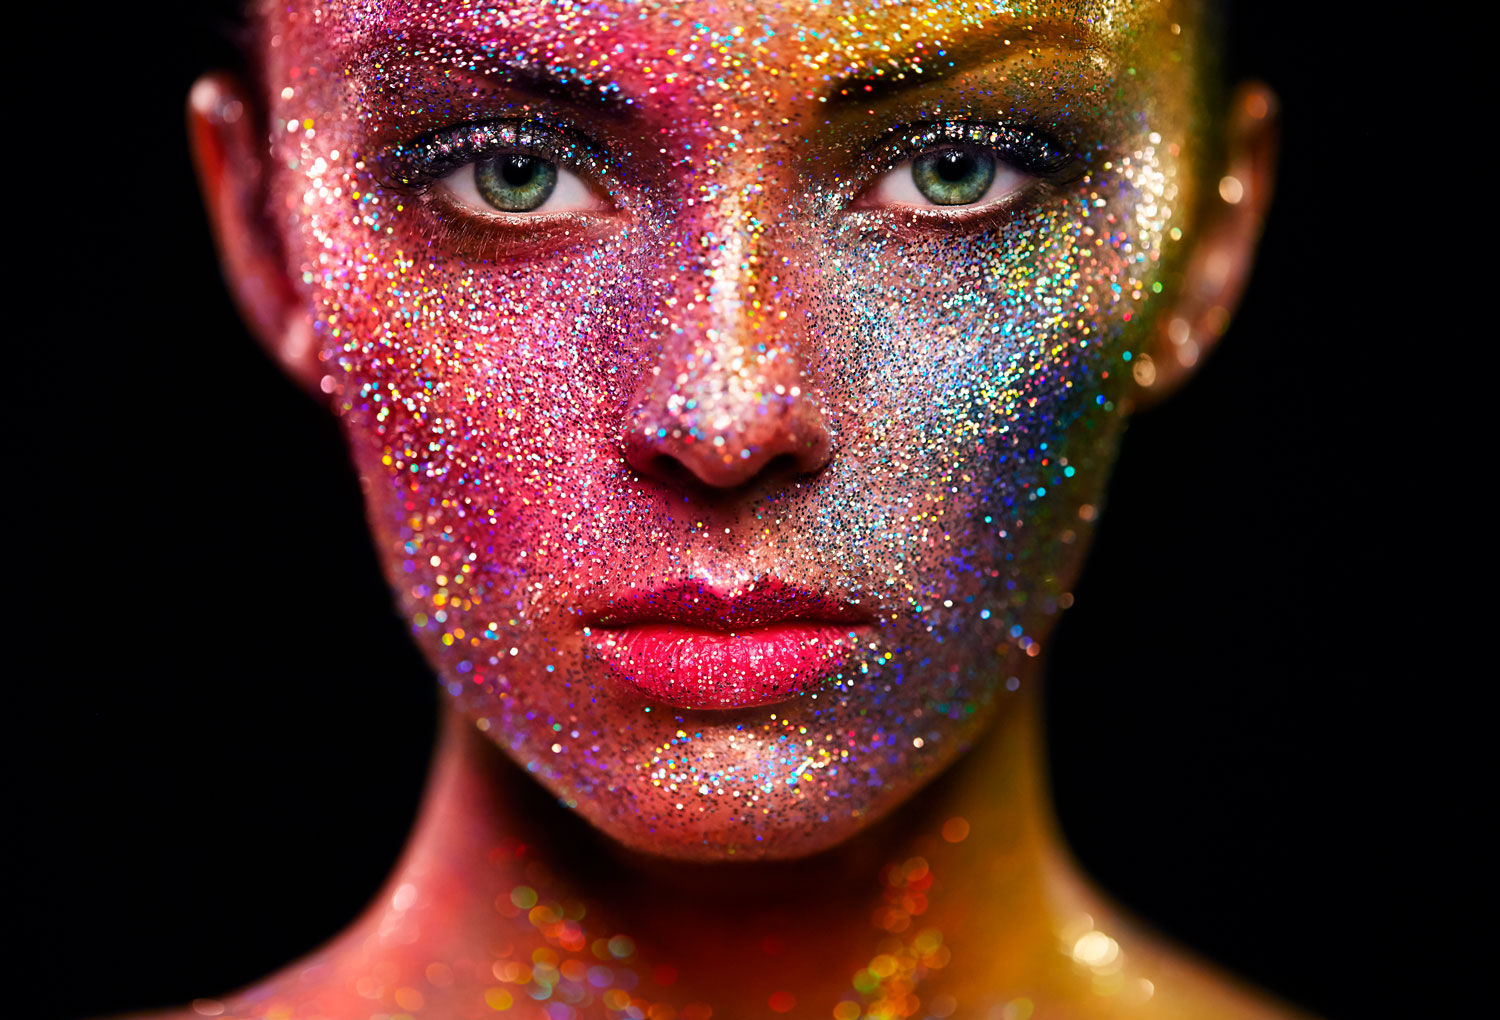
He begins with this image, courtesy of our friends at the Dreamstime image library:
Then he creates a simple stripe pattern to be laid over the original image:

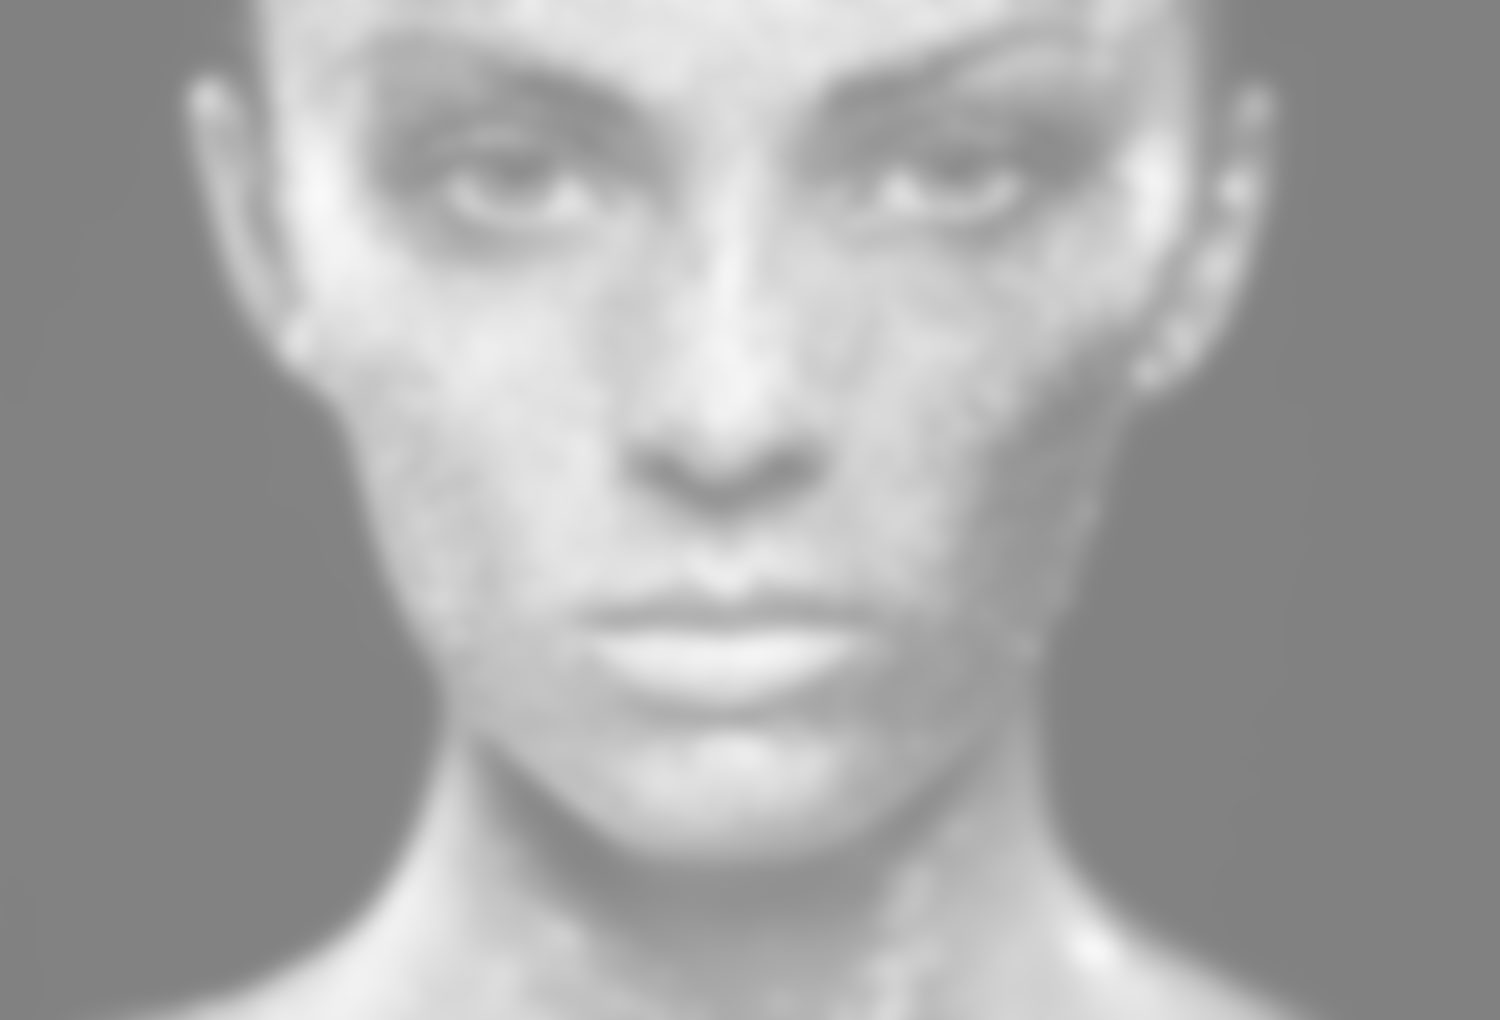
Then, by applying some Gaussian Blur and luminance adjustments to red channel, he eventually creates this “map” which will tell the stripes how to bend based on luminance levels in this file:
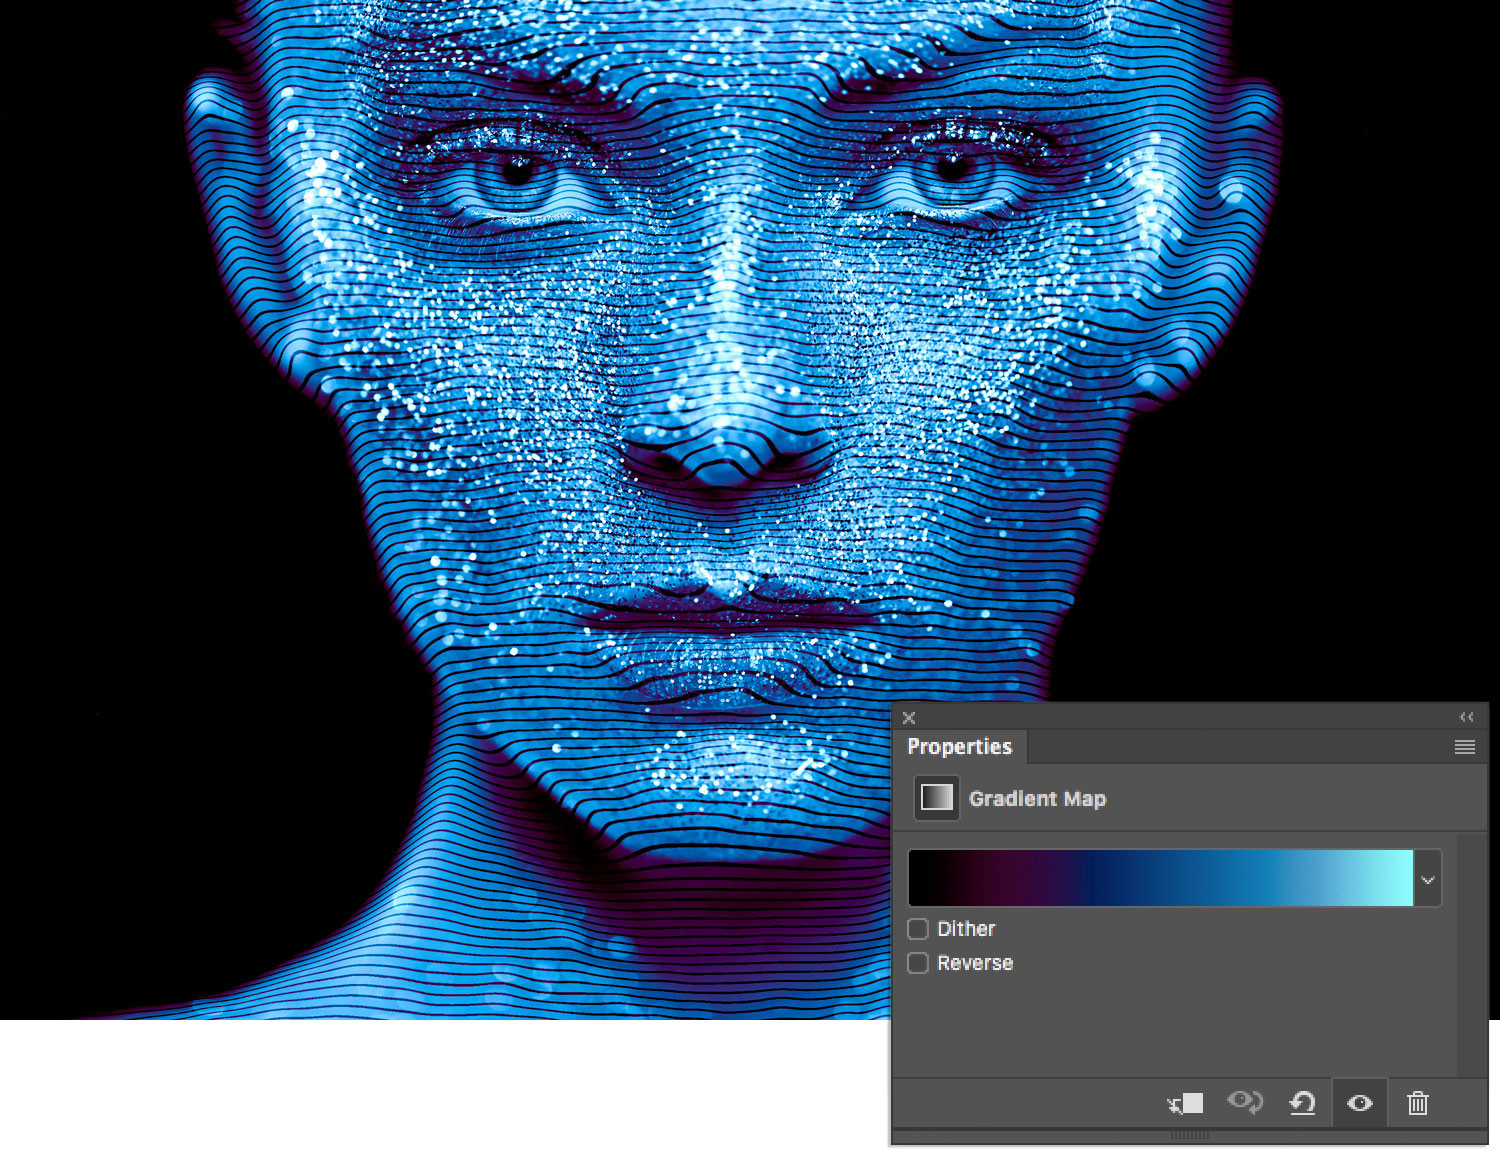
If you’re a member of Lynda.com or LinkedIn Learning, Deke’s got two exclusive movies this week. In the first, he takes the image in progress and applies a gradient map that swap out the luminance levels in the image with the colors of his custom gradient.
In the second exclusive episode, Deke uses an old school arbitrary map (which maps colors to luminance levels on a channel-by-channel basis) for a decidedly different effect (even though the colors are virtually the same as those he applied above).
Deke’s Techniques, using old school Photoshop features to make modern effects.


Be the first to drop some wisdom...