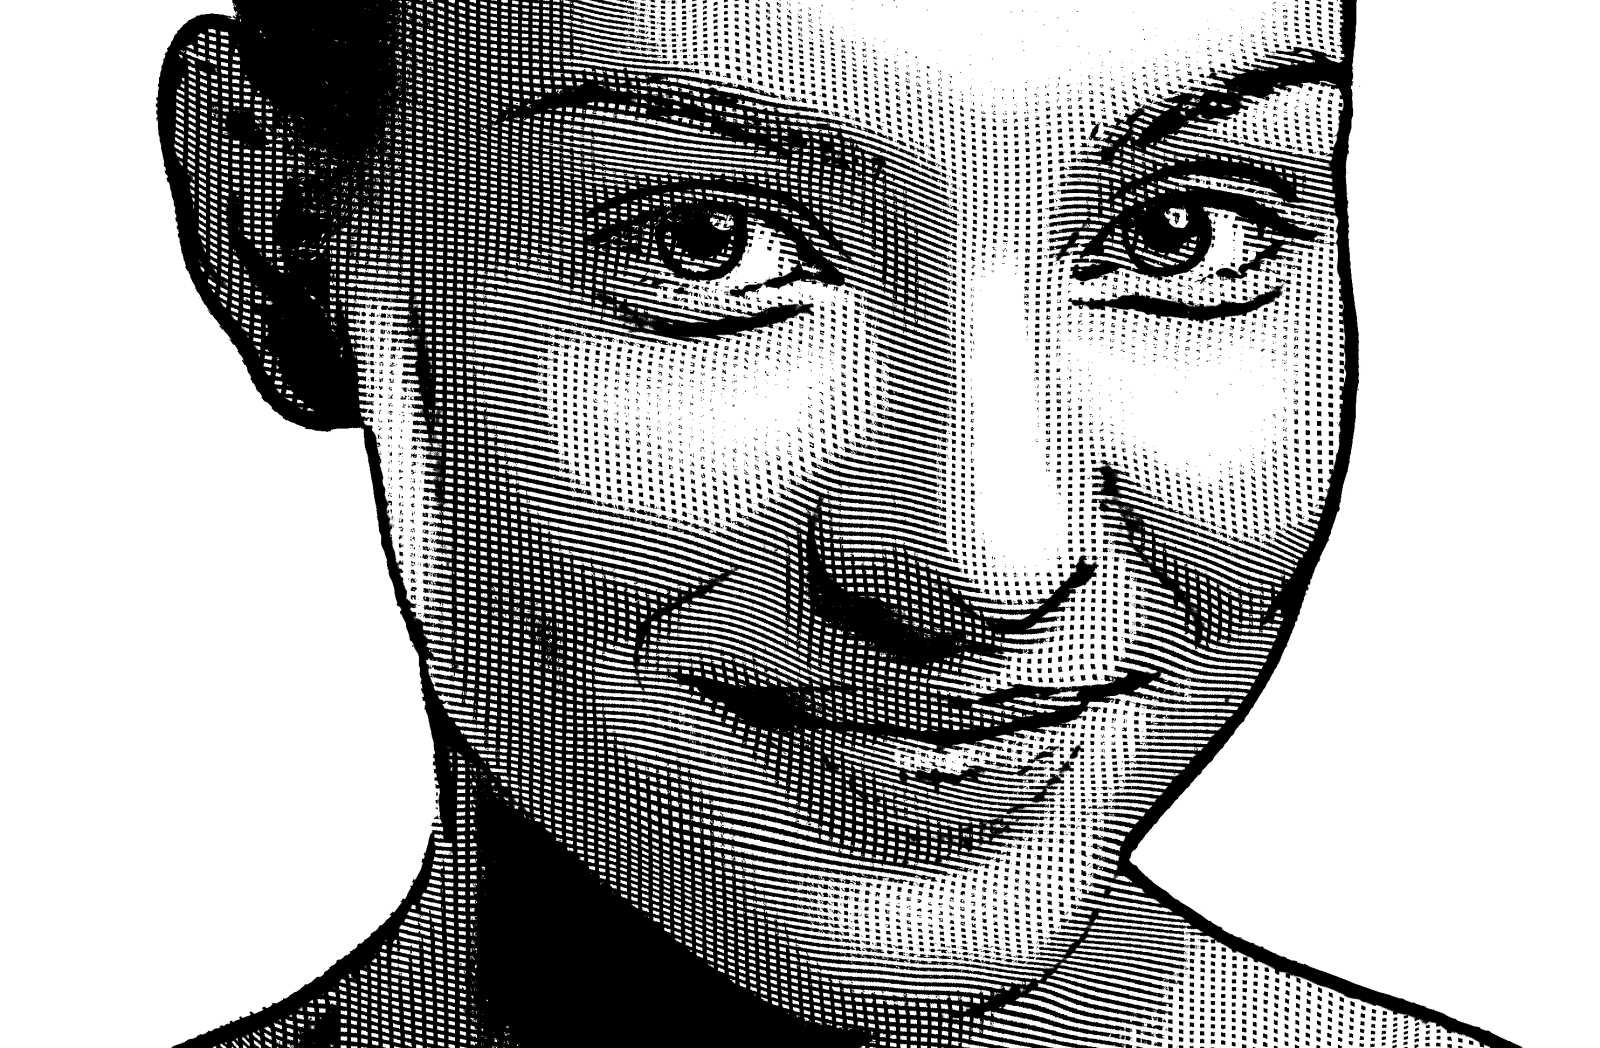
In this week’s free Deke’s Techniques episode, Deke (at last) embarks on the quest for a reasonable facsimile of a hedcut portrait. You know the ones, a stippled pen-and-ink portraits most commonly associated with the Wall Street Journal. This idea has been in the request queue for a long time, and Deke’s finally got a system that doesn’t require the use of those quintessentially non-Photoshop tools, the ink pen and human hand.
So we begin with this head shot (supplied by our friends at Dreamstime, about which you can learn more and get deals at Dreamstime.com/deke.php).

Next, Deke makes a black-and-white version of the image to serve as the background. Then, using a duplicate of that greyscale version, he converts every luminance level into 128 or higher using a Levels adjustment. This will eventually serve as a displacement map, and limiting the levels to 128 or higher will ensure everything goes in the same direction.

Next, he creates a couple of custom horizontal and vertical line patterns which he lays over the black-and-white portrait (using the Overlay blend mode) and then displaces them using the image above as a map. This causes each set of lines to wrap around the contours of the face.
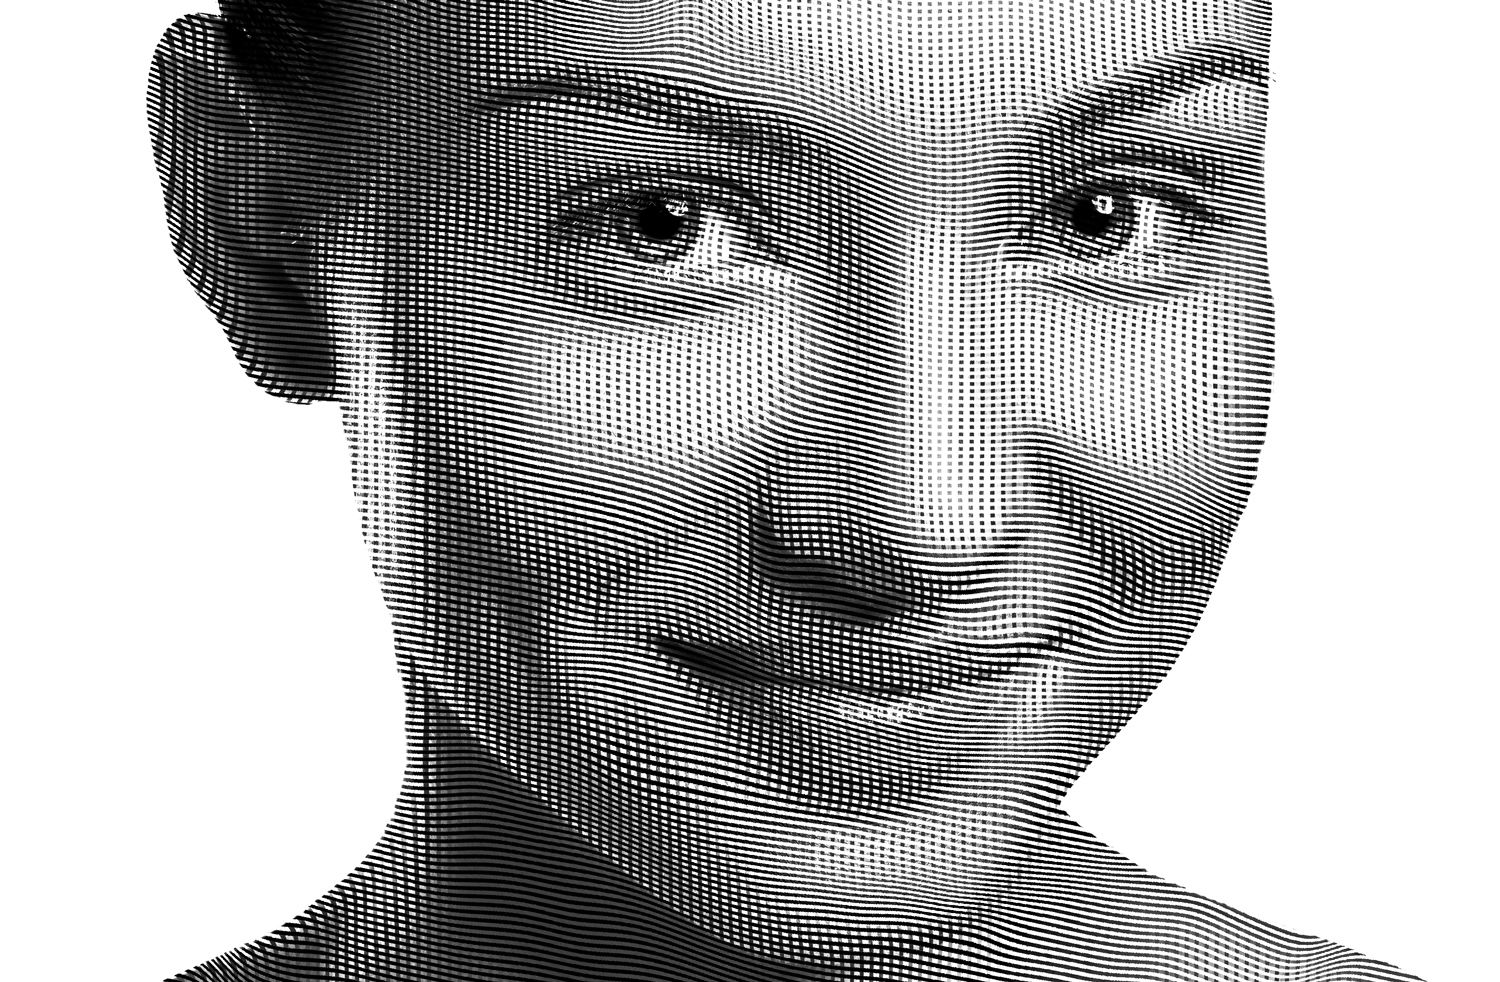
If you’re a member of Lynda.com or LinkedIn Learning, then Deke’s got an exclusive movie this week in which he takes this already cool effect and traces outlines around it to further delineate the features of the “drawing.”
Deke’s Techniques, not quite pen-and-ink but not quite having to spend the day drawing dots.
Deke McClelland
Self-appointed expert on all things graphics and imaging, here to answer your questions and serve your needs. More dekeBio here.
More Deke

dekeNow: Retouching AI Portraits in Photoshop
Have you ever used an app like Lensa? Feed it a bunch of selfies and it generates a handful of AI portraits. Which are flattering, to be sure, but they're hardly impeccable. In fact, they can be riddled with flaws. All of which you can fix using the copious retouching tools in Photoshop.

Download Asset for Impressions of Impressionism
Here is where you can download the asset for Deke's Impressions of Impressionism video from Patreon, even if you're not (yet) a patron.

Deke is Now Again!
Renown expert and deep diver Deke McClelland returns to the fray with dekeNow: a look at the current Photoshop and Illustrator state of the art of the art
Mastery Courses for Photoshop and Illustrator Are Now Updated: Series Complete!
Deke completes the One-on-One series for both Photoshop and Illustrator at LinkedIn Learning.
Be the first to drop some wisdom...