
In this week’s free Deke’s Techniques episode, Deke puts the final touches on his human-to-White Walker transformation by turning the ordinary hoodie our model was wearing into something more appropriate for an other-worldly ice zombie.
Yes, it’s an Inner Glow layer effect that does the trick, but the real trick is an obscure checkbox in the Layer Style dialog box that allows you to tell Photoshop not to use the transparency as a boundary to shape the layer.
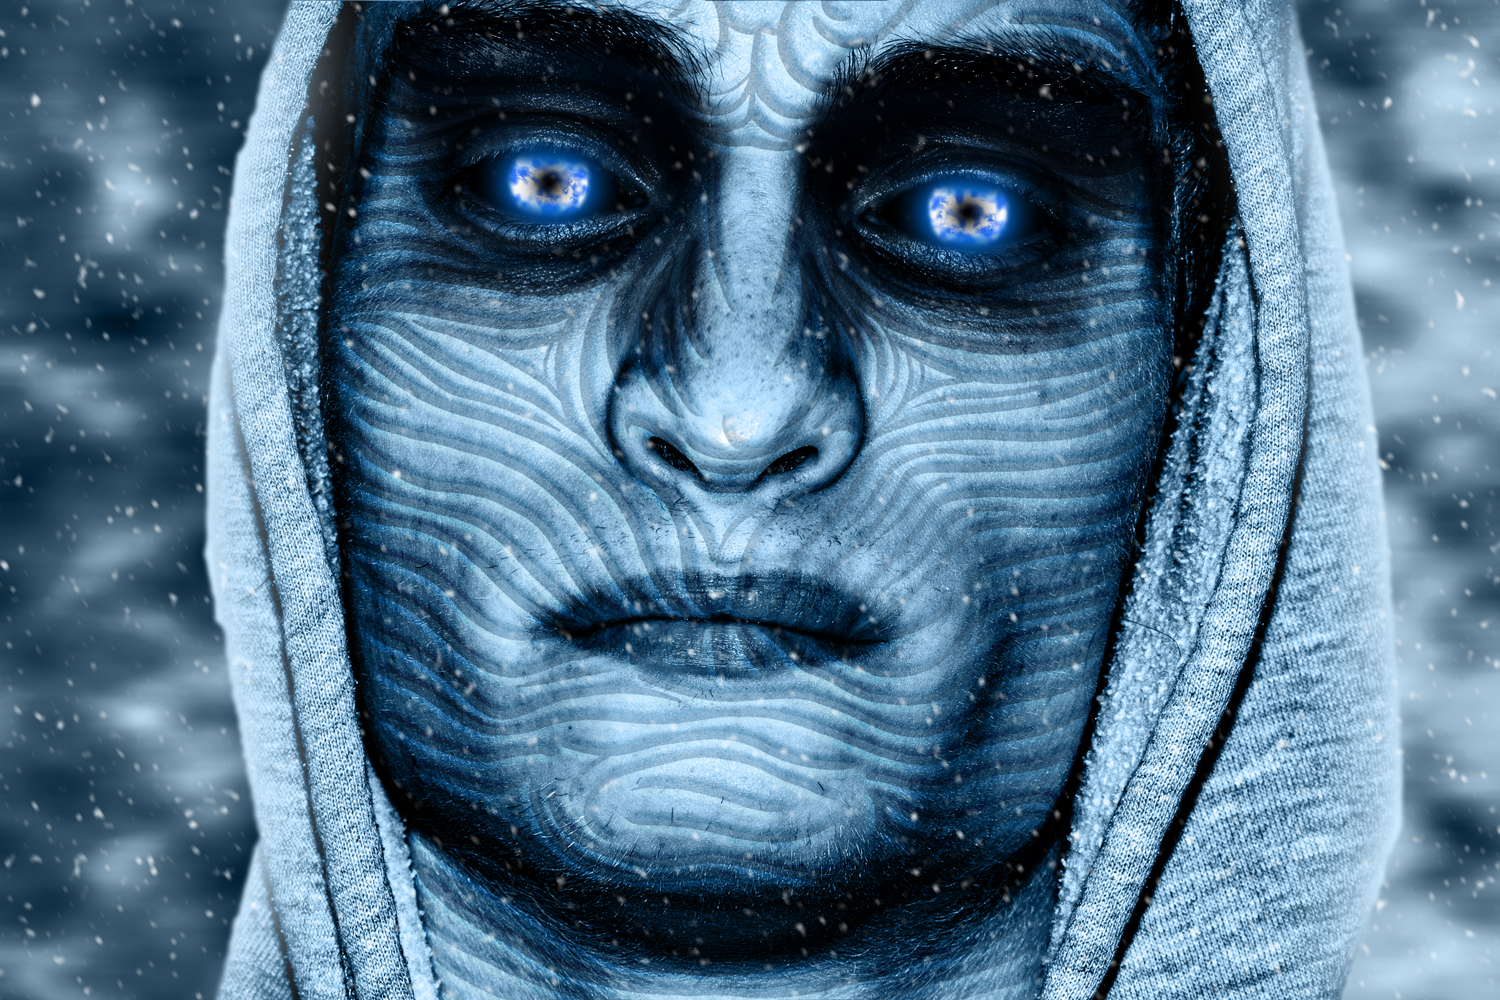
You’ll see what I mean in the video. But check out the difference between the before (when the checkbox is on, which is the default setting)...
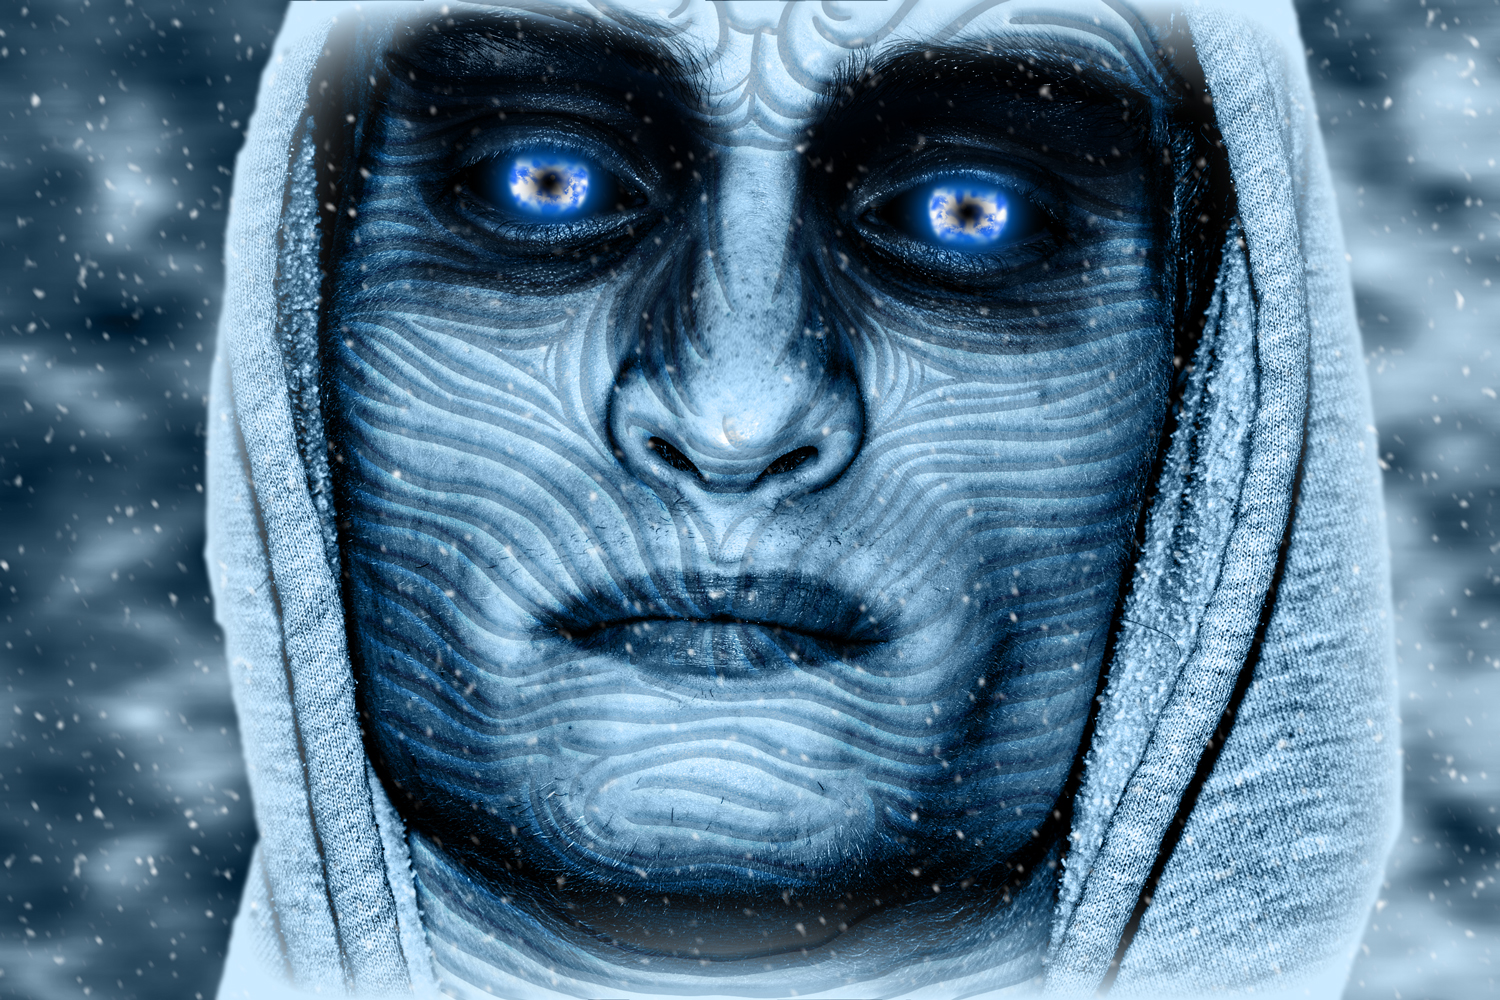
...and after, when turning the checkbox off removes the foggy glow from our model’s forehead and chin:
I promise that this is the end of our Game of Thrones experiments for now, although I think this particular episode has potential to be of use outside of the fantasy realm. While you may not have many occasions to turn people’s eyes a glowing blue, you very well may find this checkbox’s behavior to be quite useful. Layer styles are powerful, but being able to control where they appear in your image puts you on the Photoshop throne.
Deke’s Techniques, giving you the Photoshop power you deserve.


Be the first to drop some wisdom...